此前听闻过一款智能解锁插件,叫做IntelligentPass 4。我找到它的官方源以2.99美元购买后发现了这类插件的“痛点”,这也是此类可以靠识别安全蓝牙设备解锁的插件的痛点:
自从iOS7以后就无法从API直接获取蓝牙设备的MAC地址,只能用UUID来标识设备,要注意的是同一个设备在不同手机上显示的UUID并不相同,所以不能拿来做唯一标识。
但我最需要的就是使用其中的蓝牙自动解锁功能,经过我不断尝试,该类插件是无法发现我的Amazfit手表设备的。
顺便说个事,在发现这款插件对我并无作用后,我立马邮件联系了插件源的作者,希望得到帮助或者退款。但是!!!并没有人鸟我。我这才到Reddit上发现这个插件商店毫无信誉,毫无售后可言。各位记得避坑,我的2.99美元啊我去😭。
此时,我又发现了开源项目 PassBy ,我的目光便转向了它。
解决经过#
在该项目的issue上我发现也有人有此类问题:
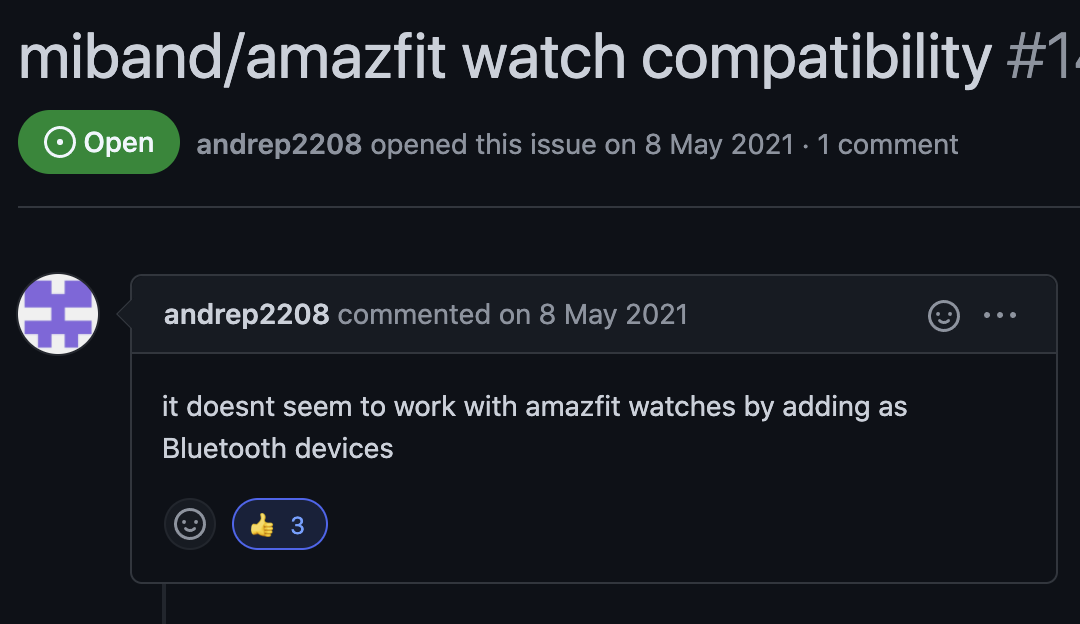
所幸PassBy为开源插件,同时我在刚才那个issue下看到有人评论提到了一些见解:
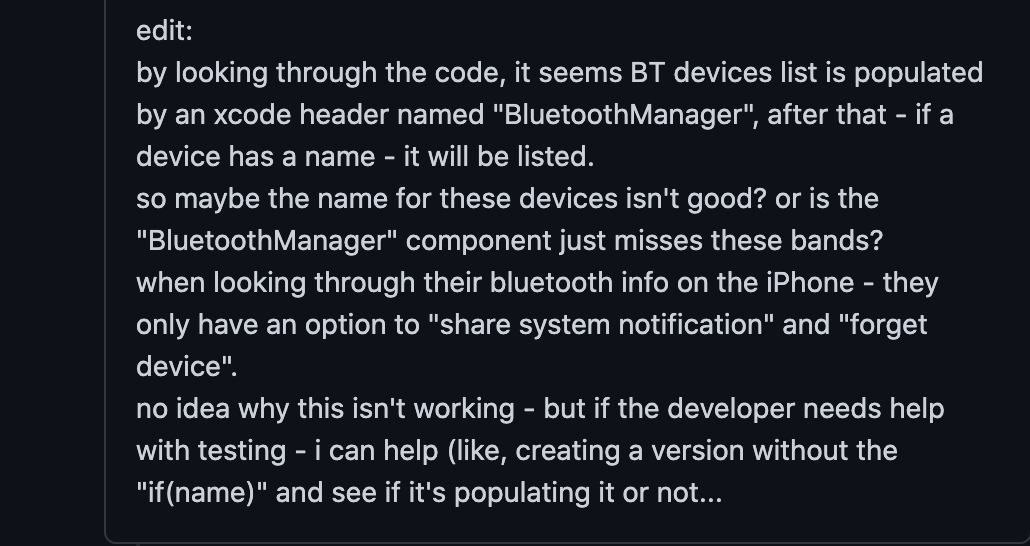
他说使用的 BluetoothManager 头来获取蓝牙设备,我们是否可以通过创建一个没有 if(name) 的版本。
自此,我觉得可以自己修改源代码,将自己需要的设备名称加在判断里面。它不能获取到我的设备,我就自己加上,想想应该还可以😂。
搭建环境#
将源代码克隆到本地后,我发现它是通过 theos 构建的,所以第一步我必须将其环境搭建好,能够正常编译出插件本体。theos的 官方文档 很详细,我是Mac系统,所以便按照其关于Mac系统的介绍方法来安装:
Installation instructions for macOS。
1
| git clone https://github.com/giorgioiavicoli/PassBy.git
|
搭建好后我便第一时间进行了编译尝试,结果发现PassBy需要的 iOS SDK 版本是13.3,但我在theos官方提供的SDK中并无发现。还好Google搜到SniperGER提供的iOS13.3版本SDK。
Copy the SDK folder(s) in sdks to $THEOS/sdks and the folder(s) in include to $THEOS/include.
代码参考如下:
1
2
3
4
5
6
7
| git clone https://github.com/SniperGER/iOS13-Private-SDK.git
cd iOS13-Private-SDK
unzip sdks/iPhoneOS13.3.sdk.zip
# 如果提示找不到$THEOS
# 请重启终端或者source一下
mv iPhoneOS13.3.sdk $THEOS/sdks
mv include/* $THEOS/include
|
修改源代码#
打开 Tweak.xm 文件(我用的Sublime Text),通过搜索关键词 bluetooth 发现控制蓝牙这块功能的主函数 isUsingBT ,原代码如下:
 1
 2
 3
 4
 5
 6
 7
 8
 9
10
11
12
13
| static BOOL isUsingBT()
{
if (useGracePeriodOnBT && allowedBTs) {
NSArray * connectedDevices = [[BluetoothManager sharedInstance] connectedDevices];
for (BluetoothDevice * bluetoothDevice in connectedDevices) {
NSString * deviceName = [bluetoothDevice name];
if (deviceName && [deviceName length] && [allowedBTs containsObject:SHA1(deviceName)]) {
return YES;
}
}
}
return NO;
}
|
因为我对 objective-c 语言不熟悉,并没有去系统学习过,所以只有靠学过的C语言的一点点底子看了一下,发现确实如上面所说,用的 BluetoothManager 头文件,其中最主要的逻辑如下:

1
2
3
| if (deviceName && [deviceName length] && [allowedBTs containsObject:SHA1(deviceName)]) {
return YES;
}
|
它将你允许的安全蓝牙设备名字 deviceName 存到 allowedBTs 中,我还发现它将 devicename 的 sha1 值这个数据最终存到了 passbybt.plist 文件中:
1
| #define BT_PLIST_PATH "/var/mobile/Library/Preferences/com.giorgioiavicoli.passbybt.plist"
|
于是我修改 isUsingBT() 函数如下,也就是多添加了一个条件判断if在上面判断语句的后面:
1
2
3
| if ([allowedBTs containsObject:SHA1(@"Amazfit GTS 2")]) {
return YES;
}
|
修改后的该函数整体代码如下所示,请参照正确的位置进行修改:

1
2
3
4
5
6
7
8
9
10
11
12
13
14
15
16
17
18
| static BOOL isUsingBT()
{
if (useGracePeriodOnBT && allowedBTs) {
NSArray * connectedDevices = [[BluetoothManager sharedInstance] connectedDevices];
for (BluetoothDevice * bluetoothDevice in connectedDevices) {
NSString * deviceName = [bluetoothDevice name];
if (deviceName && [deviceName length] && [allowedBTs containsObject:SHA1(deviceName)]) {
                return YES;
            }
// 这里开始
if ([allowedBTs containsObject:SHA1(@"Amazfit GTS 2")]) {
return YES;
}
// 这里结束
}
}
return NO;
}
|
注:我需要添加的设备名为 Amazfit GTS 2 ,请根据个人情况自行修改!
修改文件#
上面看到它是将设备名的 sha1 值这个数据存到 passbybt.plist 文件中,我们在iPhone中用 Filza 找到这个文件,发现确实如此,它是一个字典格式。
| sha1 | bool |
|---|
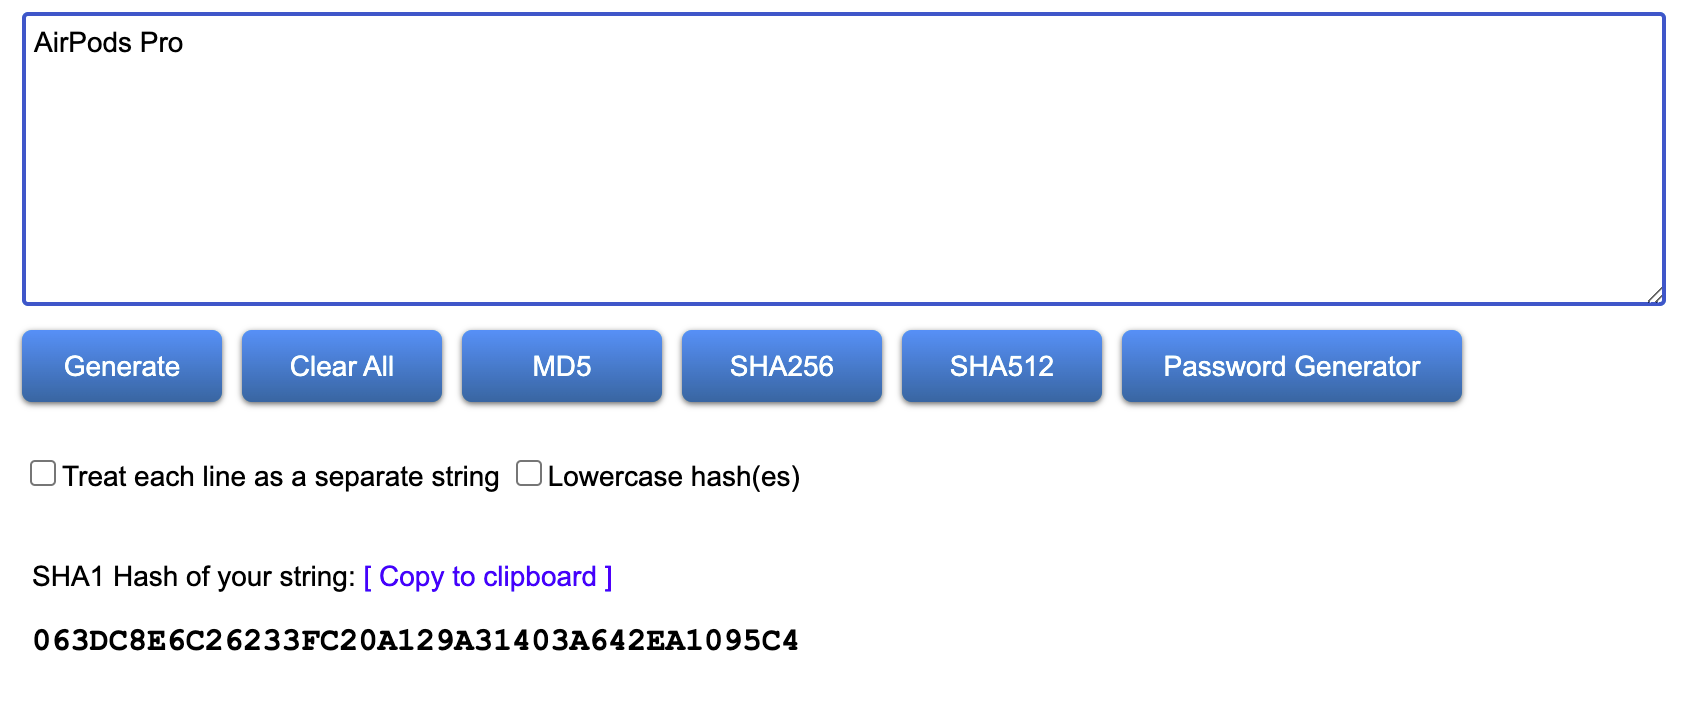
| 063dc8e6c26233fc20a129a31403a642ea1095c4 | true |
| 811e9e206b053a4e02c74155bfa27b6c84e7dcad | true |
我们利用下面的网页工具将设备名生成对应的sha1值后新添加一个键值对即可:SHA-1 Hash Generator。
2022.12.15 更新:
感谢网友Vivian Chen发邮件提醒我生成sha1的网站已经失效,并且还提供了一个新的网站,再次感谢!
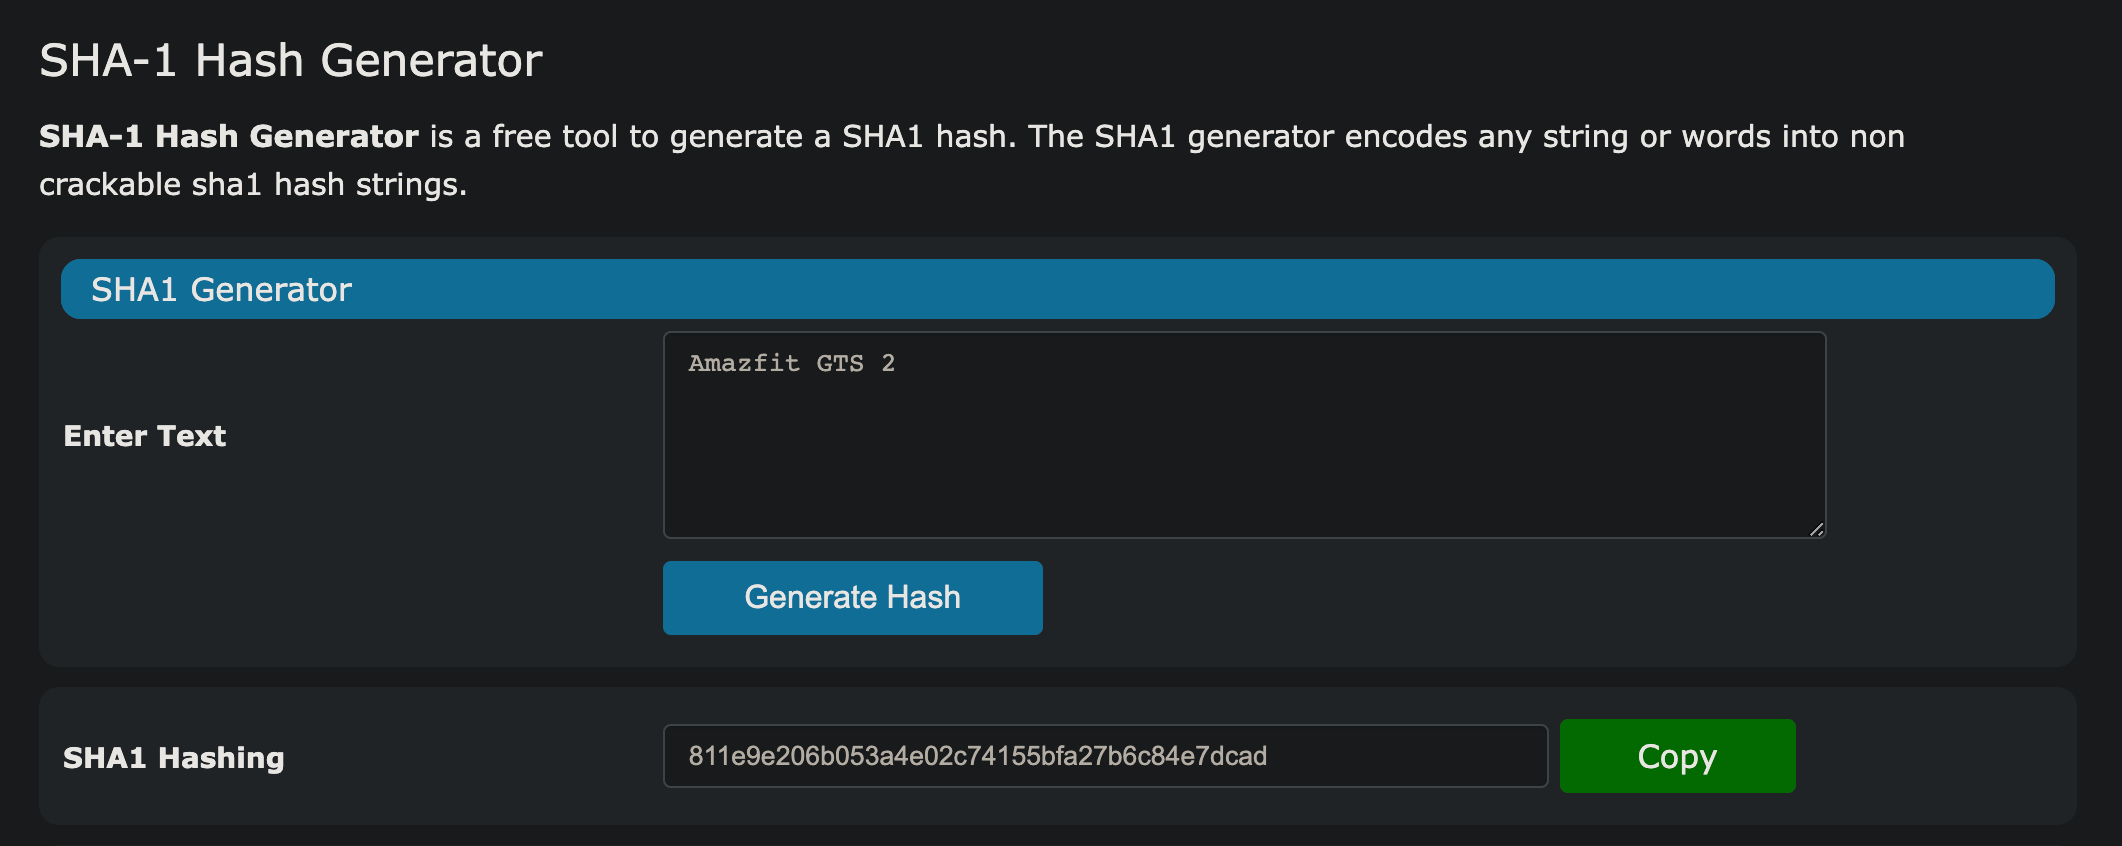
特别更新:
必须勾选上网页的 Lowercase hash 选项,将hash值全部转化为小写,一定要记得!!!
打包安装#
在PassBy项目文件夹新建终端,输入命令 make package 即可打包成deb文件,用Filza打开安装即可。
1
2
3
4
5
6
7
8
9
10
11
12
13
14
15
16
17
18
19
20
21
22
23
24
25
26
27
28
29
30
31
32
33
34
35
36
37
38
39
40
41
42
43
44
45
46
47
48
49
50
51
52
53
54
55
56
57
58
59
60
61
62
63
64
65
66
67
68
69
| yuesir at iMac in ~/Documents/iOS
$ cd PassBy
yuesir at iMac in ~/Documents/iOS/PassBy (master●)
$ make package
==> Warning: Building for iOS 9.0, but the current toolchain can’t produce arm64e binaries for iOS earlier than 14.0. More information: https://theos.dev/docs/arm64e-deployment
> Making all for tweak PassBy…
==> Preprocessing Tweak.xm…
==> Preprocessing Tweak.xm…
==> Preprocessing Tweak.xm…
==> Compiling Tweak.xm (arm64)…
==> Compiling Tweak.xm (armv7)…
==> Compiling Tweak.xm (arm64e)…
==> Linking tweak PassBy (arm64e)…
==> Generating debug symbols for PassBy…
==> Stripping PassBy (arm64e)…
==> Linking tweak PassBy (arm64)…
==> Generating debug symbols for PassBy…
==> Stripping PassBy (arm64)…
==> Linking tweak PassBy (armv7)…
==> Generating debug symbols for PassBy…
==> Stripping PassBy (armv7)…
==> Merging tweak PassBy…
==> Signing PassBy…
> Making all in passbyprefs…
==> Warning: Building for iOS 9.0, but the current toolchain can’t produce arm64e binaries for iOS earlier than 14.0. More information: https://theos.dev/docs/arm64e-deployment
> Making all for bundle PassByPrefs…
==> Copying resource directories into the bundle wrapper…
==> Compiling PassByRootListController.m (arm64)…
==> Compiling PassByRootListController.m (armv7)…
==> Compiling PassByRootListController.m (arm64e)…
==> Linking bundle PassByPrefs (arm64e)…
==> Generating debug symbols for PassByPrefs…
==> Stripping PassByPrefs (arm64e)…
==> Linking bundle PassByPrefs (arm64)…
==> Generating debug symbols for PassByPrefs…
==> Stripping PassByPrefs (arm64)…
==> Linking bundle PassByPrefs (armv7)…
==> Generating debug symbols for PassByPrefs…
==> Stripping PassByPrefs (armv7)…
==> Merging bundle PassByPrefs…
==> Signing PassByPrefs…
> Making all in passbyflipswitch…
==> Warning: Building for iOS 9.0, but the current toolchain can’t produce arm64e binaries for iOS earlier than 14.0. More information: https://theos.dev/docs/arm64e-deployment
> Making all for bundle PassByFlipswitch…
==> Copying resource directories into the bundle wrapper…
==> Preprocessing Switch.xm…
==> Preprocessing Switch.xm…
==> Preprocessing Switch.xm…
==> Compiling Switch.xm (arm64)…
==> Compiling Switch.xm (armv7)…
==> Linking bundle PassByFlipswitch (arm64)…
==> Generating debug symbols for PassByFlipswitch…
==> Stripping PassByFlipswitch (arm64)…
==> Linking bundle PassByFlipswitch (armv7)…
==> Generating debug symbols for PassByFlipswitch…
==> Stripping PassByFlipswitch (armv7)…
==> Compiling Switch.xm (arm64e)…
==> Linking bundle PassByFlipswitch (arm64e)…
==> Generating debug symbols for PassByFlipswitch…
==> Stripping PassByFlipswitch (arm64e)…
==> Merging bundle PassByFlipswitch…
==> Signing PassByFlipswitch…
> Making stage for tweak PassBy…
> Making stage in passbyprefs…
> Making stage for bundle PassByPrefs…
> Making stage in passbyflipswitch…
> Making stage for bundle PassByFlipswitch…
dm.pl: building package `com.giorgioiavicoli.passby:iphoneos-arm' in `./packages/com.giorgioiavicoli.passby_1.9.1_iphoneos-arm.deb'
|
如上所示,我编译好的文件在当前目录的packages/com.giorgioiavicoli.passby_1.9.1_iphoneos-arm.deb位置。
注:如果出现用 Zebra 安装不生效时,修改一下版本号,打开PassBy根目录下的 control 文件,修改 Version 再打包安装即可。
经测试,我的 Amazfit GTS 2 能够正常解锁使用。因为我对 Obejective-c 语言并不熟悉,虽说步骤还是比较麻烦,但能够成功解决问题,我已是满足了。
Github项目PassBy
Github项目theos
更新1#
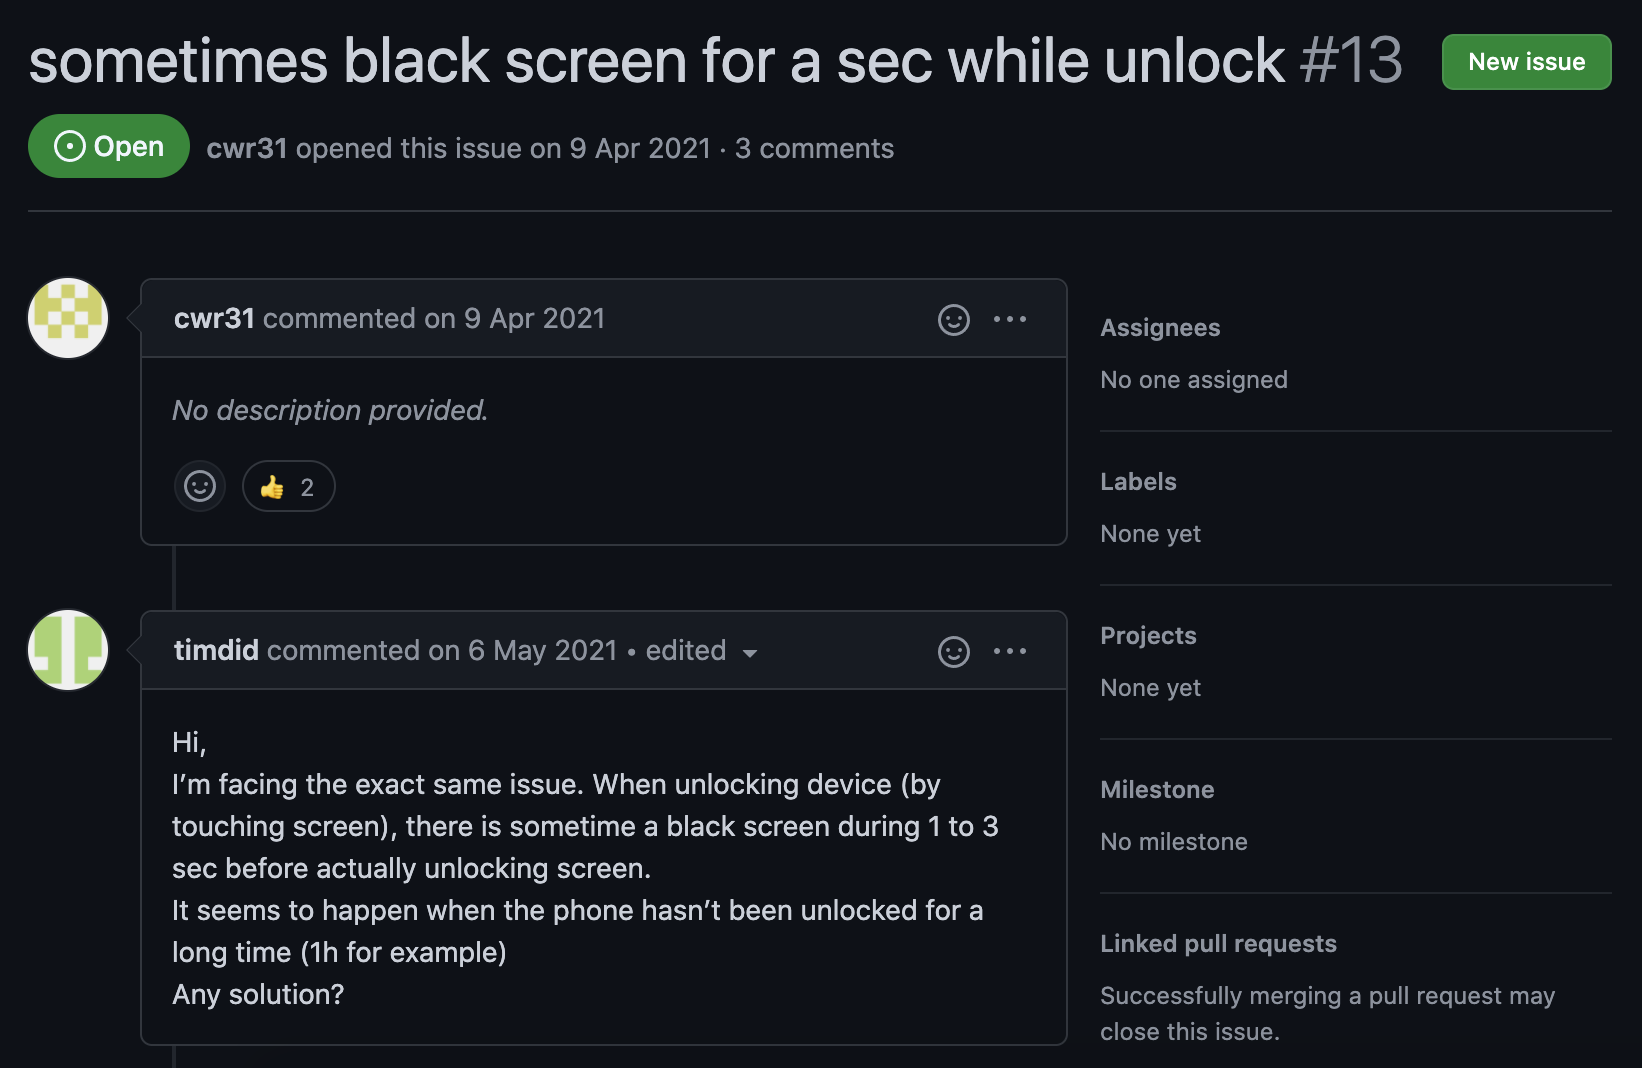
我在使用一段时间插件后发现我手机会出现点亮时多黑屏两三秒的情况。果然,在GitHub上这才发现也有人提了这个问题,限于我技术不行,不知道这是什么问题,怎么解决,遂放弃了这个插件。
更新2#
如果出现不能编译错误,提示 File Not Found,请进行编译章节中提示的操作:
Copy the SDK folder(s) in sdks to $THEOS/sdks and the folder(s) in include to $THEOS/include.
这一操作在SDK作者的GitHub的ReadME文件中也有展示,请详细阅读。
更新3#
鉴于我技术不行,按照文章里这么修改的话,安全性方面似乎有些问题,目前我也不知道怎么改进。
如果不介意并且不会编译的话,可以评论区留言设备名称,我帮你编译。
安装后,插件设置的设备列表里面并不会出现该设备,也就是不会发生变化。只需要记住在 passbybt.plist 文件那里修改值为true即为开启,false即为关闭。
更新4#
我在新设备上编译该插件时频频报错,最终通过切换Xcode版本到12.5.1得以解决。
详情见:切换Xcode以编译未适配的theos插件。


