Due to the author's frequent use of conda to configure the R kernel jupyter notebook on Linux remote servers, some steps are forgotten over time (the main problem is that the same pit will be stepped on differently every time). After summarizing the relevant tutorials and personal experience on the internet, a guide is provided for everyone and future me to refer to.
Due to the author’s frequent use of conda to configure the R kernel jupyter notebook on Linux remote servers, some steps are forgotten over time (the main problem is that the same pit will be stepped on differently every time).
After summarizing the relevant tutorials and personal experience on the internet, a guide is provided for everyone and future me to refer to.
To start with an introduction to Conda, Anaconda and some of the connections between them.
Conda
is a package manager that supports binary packages, so you don’t need to compile from source when installing, and you can also install native libraries. However, some of the Python libraries in pip are not found in conda.
Anaconda
is a Python scientific computing distribution managed with Conda.
Conda Forge
is another Python distribution that is more package rich than Anaconda. But one pitfall here is that Conda Forge and Anaconda are not fully compatible, so if you have a project that uses packages from both Anaconda and Conda Forge, there is a chance that it will hang.
Usually the servers I use have Anaconda installed beforehand,
Here is the official Anaconda Installing Anaconda on Linuxdocument with detailed step-by-step instructions and command explanations.
2022.10.17 Update Linux - Anaconda installation process under Centos7.
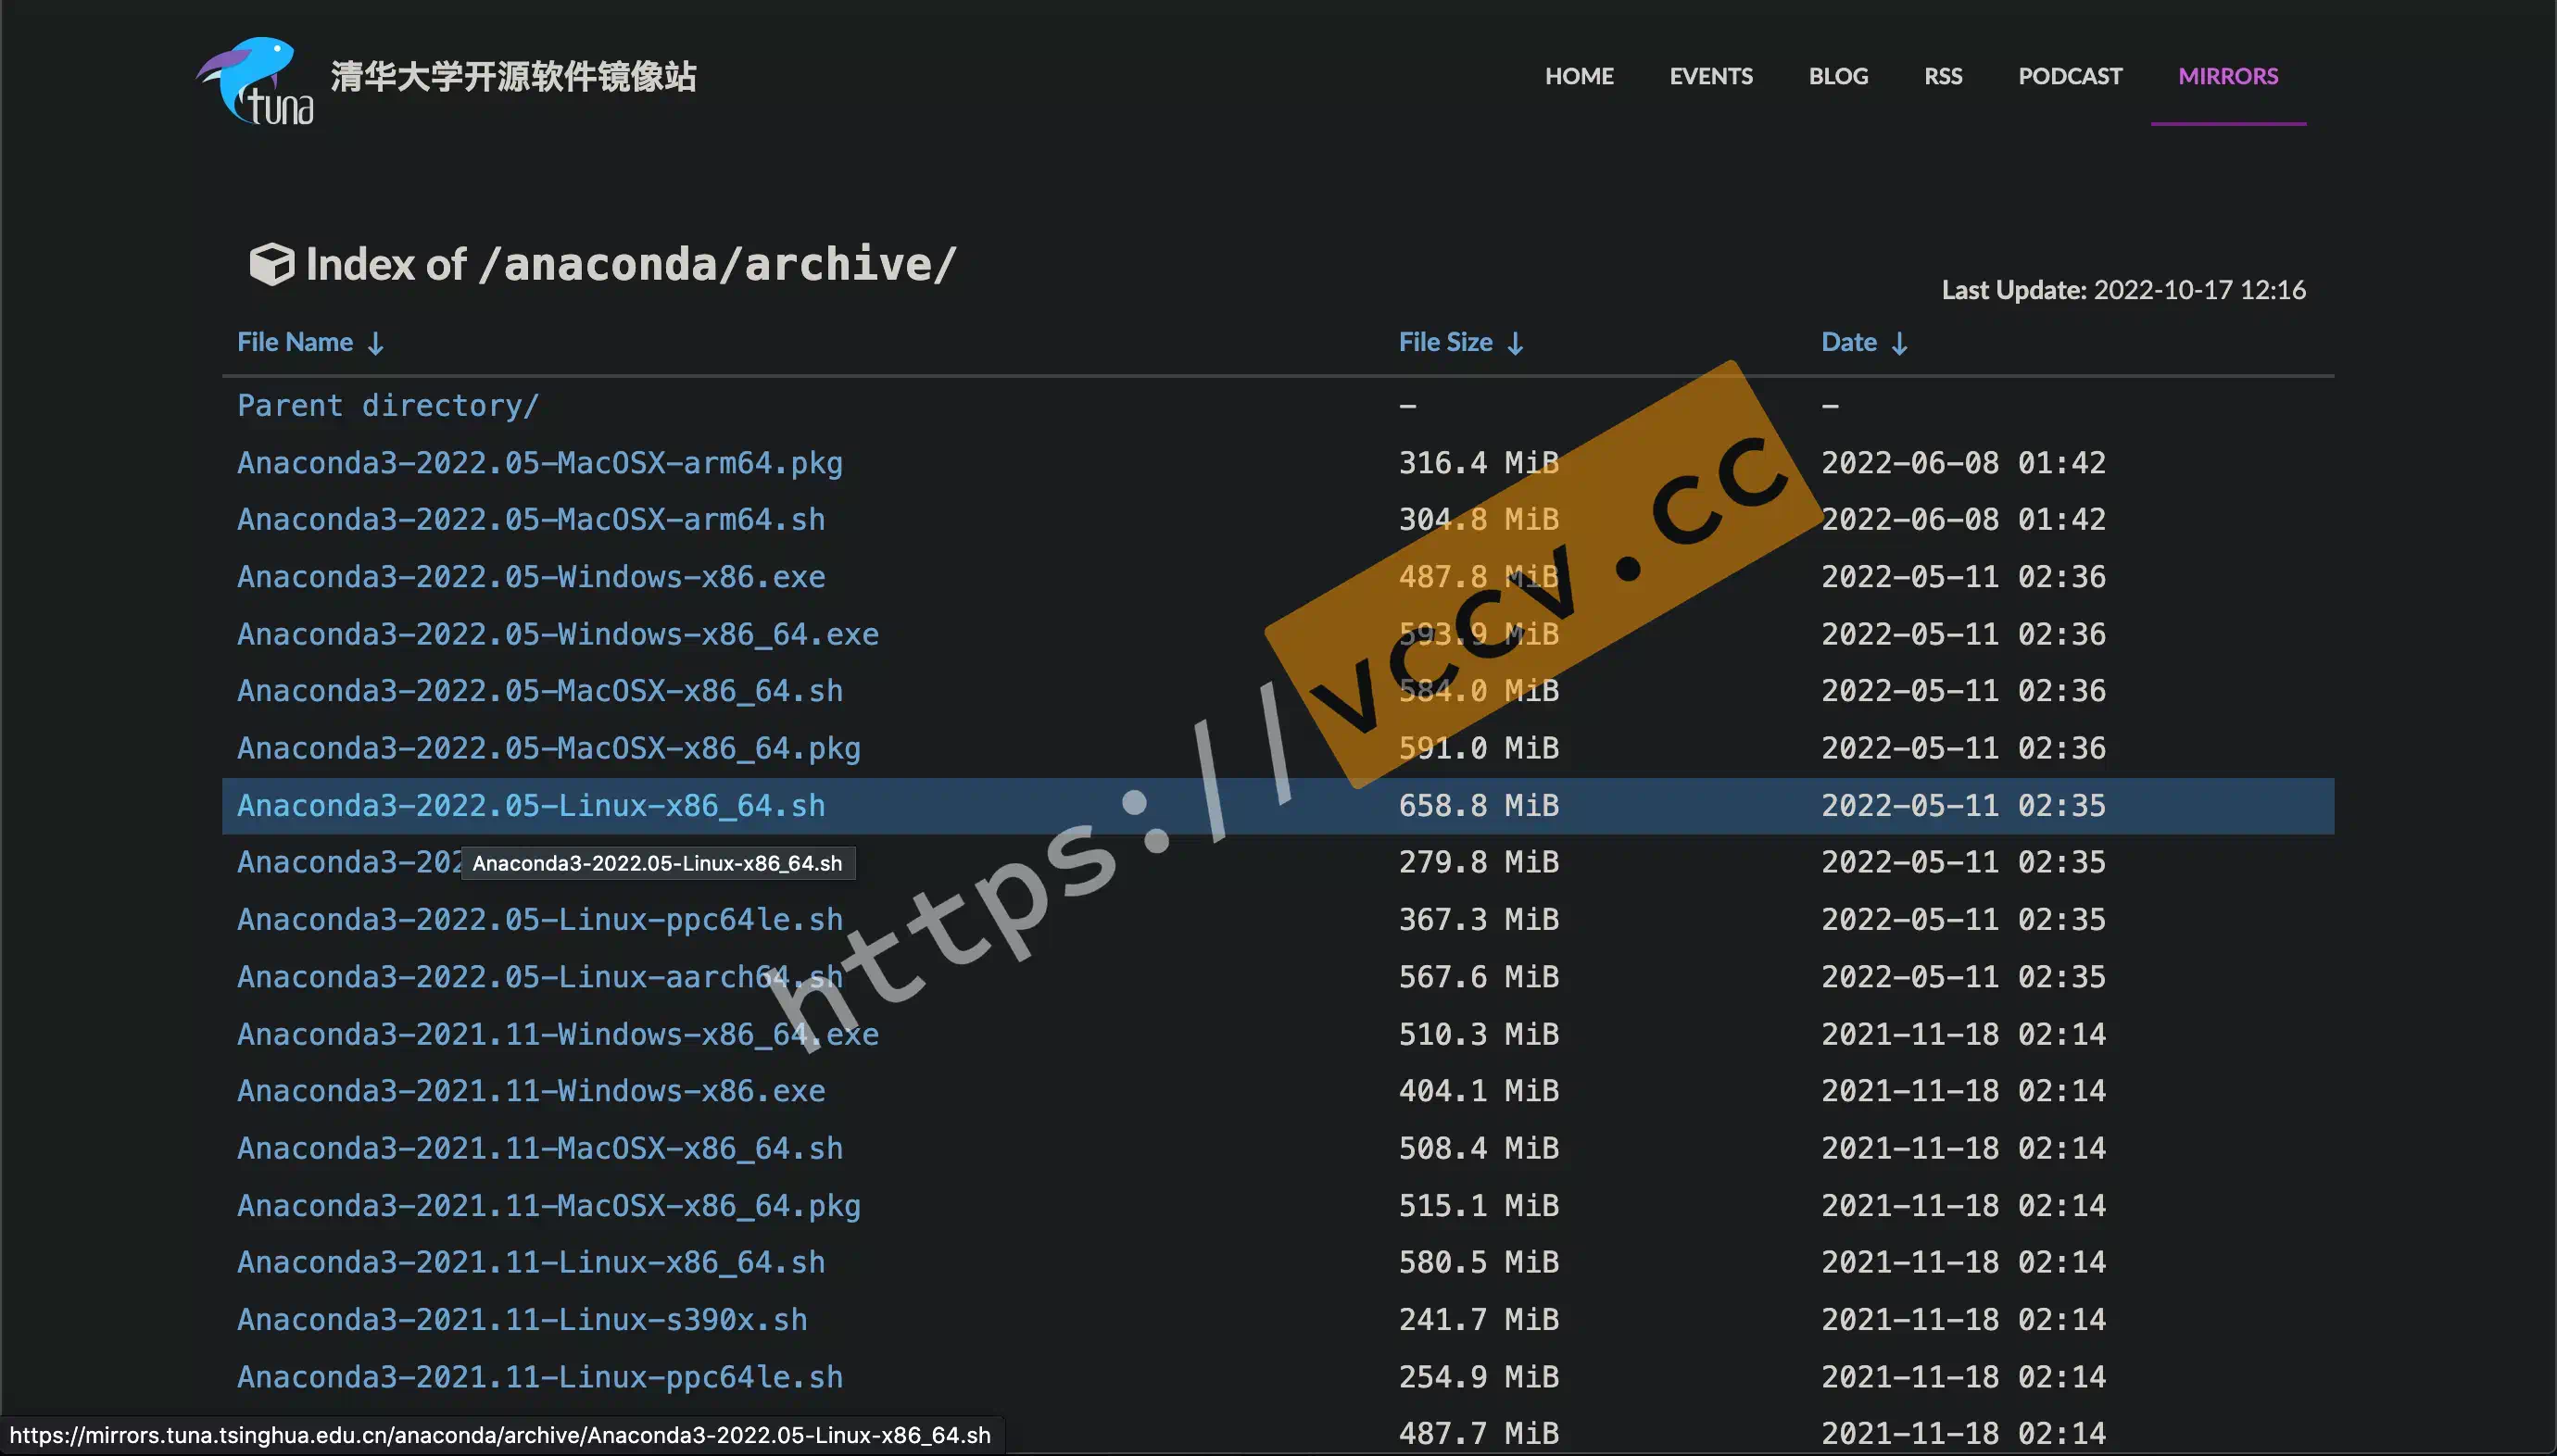
Due to the special domestic environment, it is still recommended to download Anaconda installation scripts directly from domestic sources such as Tsinghua University Mirror Source
, usually choosing the x86_64 version of.
Chrome can be downloaded by right clicking and copying the file link address and then using wget in centos:
1
2
3
4
5
6
# Download scriptwget https://mirrors.tuna.tsinghua.edu.cn/anaconda/archive/Anaconda3-2022.05-Linux-x86_64.sh
# If prompted without wget use yum installyum install wget
# Execute the installation script Change the script name yourselfbash Anaconda3-2022.05-Linux-x86_64.sh
Here are some options I encountered myself, for the record. Please follow the script prompts as you see fit and enter.
# Follow the prompt and type ENTER (enter)Welcome to Anaconda3 2022.05
In order to continue the installation process, please review the license
agreement.
Please, press ENTER to continue>> ENTER
# Follow the prompts and enter yesDo you accept the license terms?
[no] >>>
Please answer 'yes' or 'no':'
>>> yes
# Follow the prompts and type ENTER (enter)
# Anaconda3 will now be installed into this location:
/root/anaconda3
- Press ENTER to confirm the location
- Press CTRL-C to abort the installation
- Or specify a different location below
[/root/anaconda3] >>> ENTER
# conda initialization default no recommend entering yes
# If you choose no, you need to configure the environment variables yourself (Baidu keyword anaconda environment variables)
installation finished.
Do you wish the installer to initialize Anaconda3 by running conda init?
Do you want the installer to initialize Anaconda3 by running conda init?
[no] >>> yes
# Here are some tips, briefly translated
# For conda to take effect you need to close and reopen the current shell (reconnect to ssh)
# If you don't need to activate the conda base environment at startup enter conda config --set auto_activate_base false==> For changes to take effect, close and re-open your current shell.
If you'd prefer that conda's base environment not be activated on startup,
set the auto_activate_base parameter to false:
conda config --set auto_activate_base false
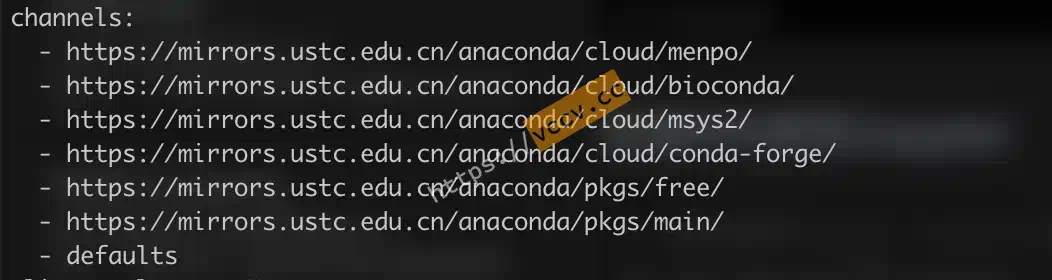
Anaconda is now installed, and by the way it is recommended to add domestic sources:
I am creating a new conda environment directly to avoid dependency conflicts with the least effort.
1
2
3
4
5
6
7
8
9
10
11
12
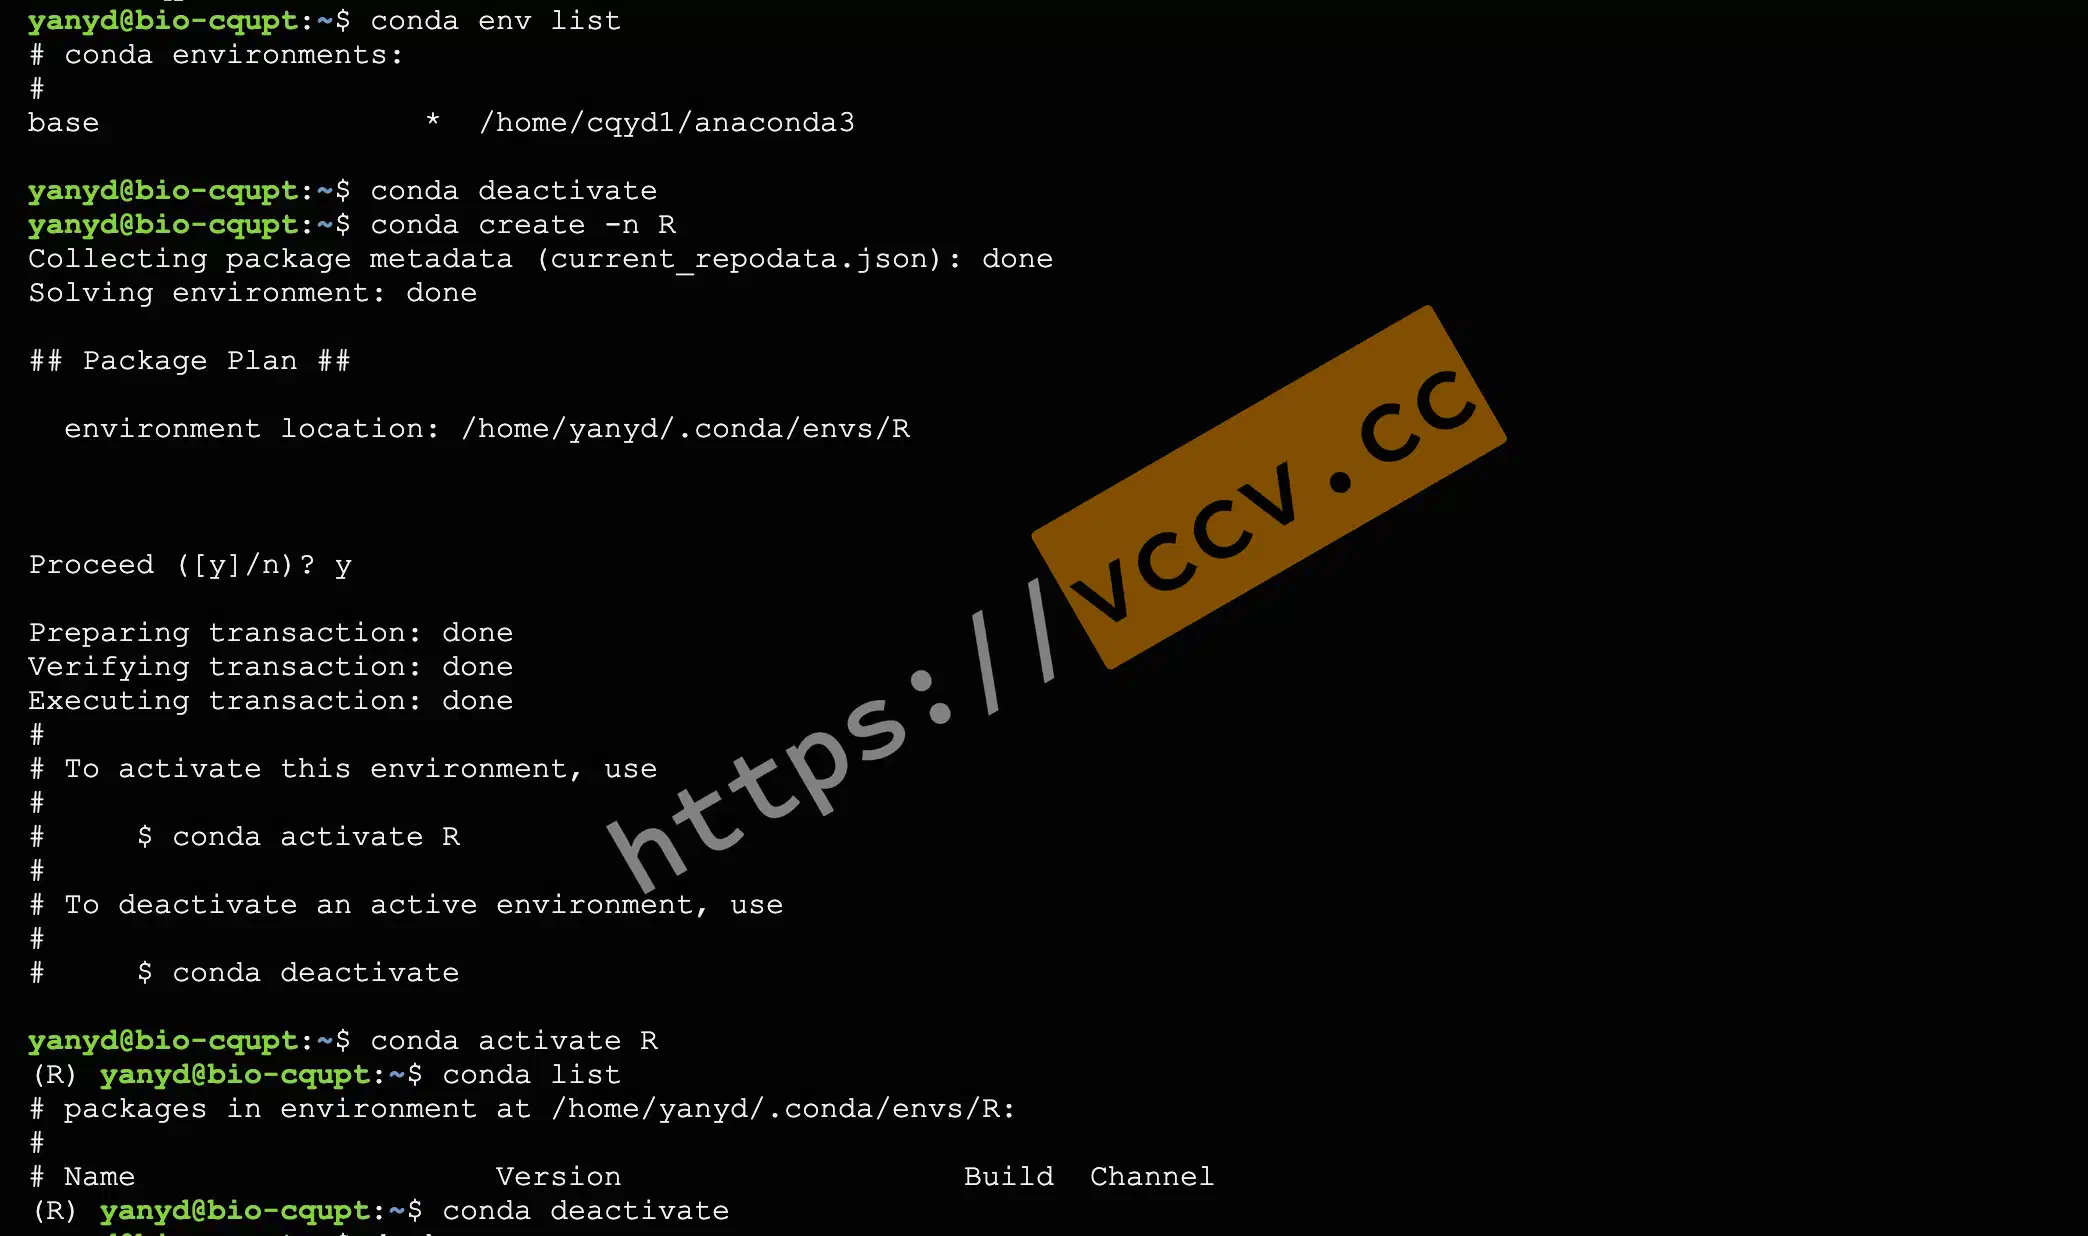
# View existing conda environmentsconda env list
# Create a new environment by name# your_new_name_to_conda Replace with the name of the environment you wantconda create -n your_new_name_to_conda
# Activate the new environmentconda activate your_new_name_to_conda
# Check the installed dependencies# The new environment is, of course, free of anythingconda list
# Quit the new environmentconda deactivate
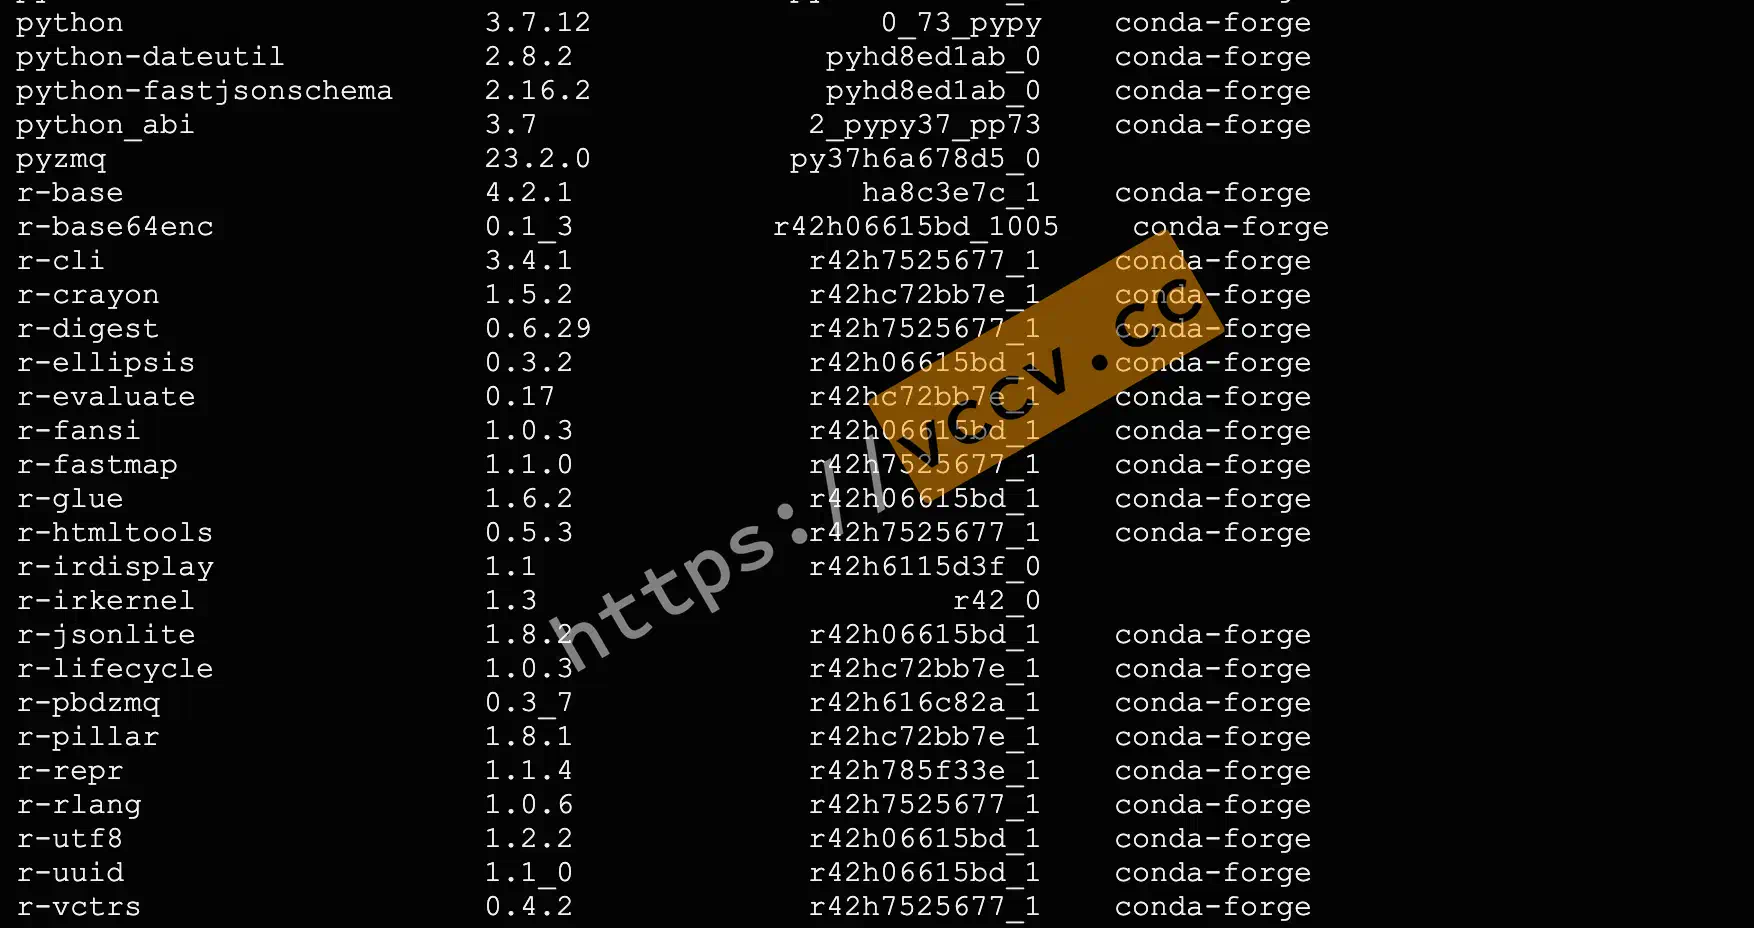
Note here that you cannot use conda install r directly to install R.
If you enter the above command directly, you will be installing version 3.6 (I think) of R. This version is too old and many R packages are not available. As of 2022.10.10, the latest version of R’s conda is 4.2.1.
The following will explain how to install the latest version of R (4.2.1).
1
2
# conda install r-base via conda-forgeconda install -c conda-forge r-base
conda-forge is also described at the beginning of the article, I feel it can be understood as a distribution inside Linux, maybe?
Before confirming the installation (i.e. before entering y), you can make sure beforehand if the version of r-base is version 4 or higher (currently 4.2.1).
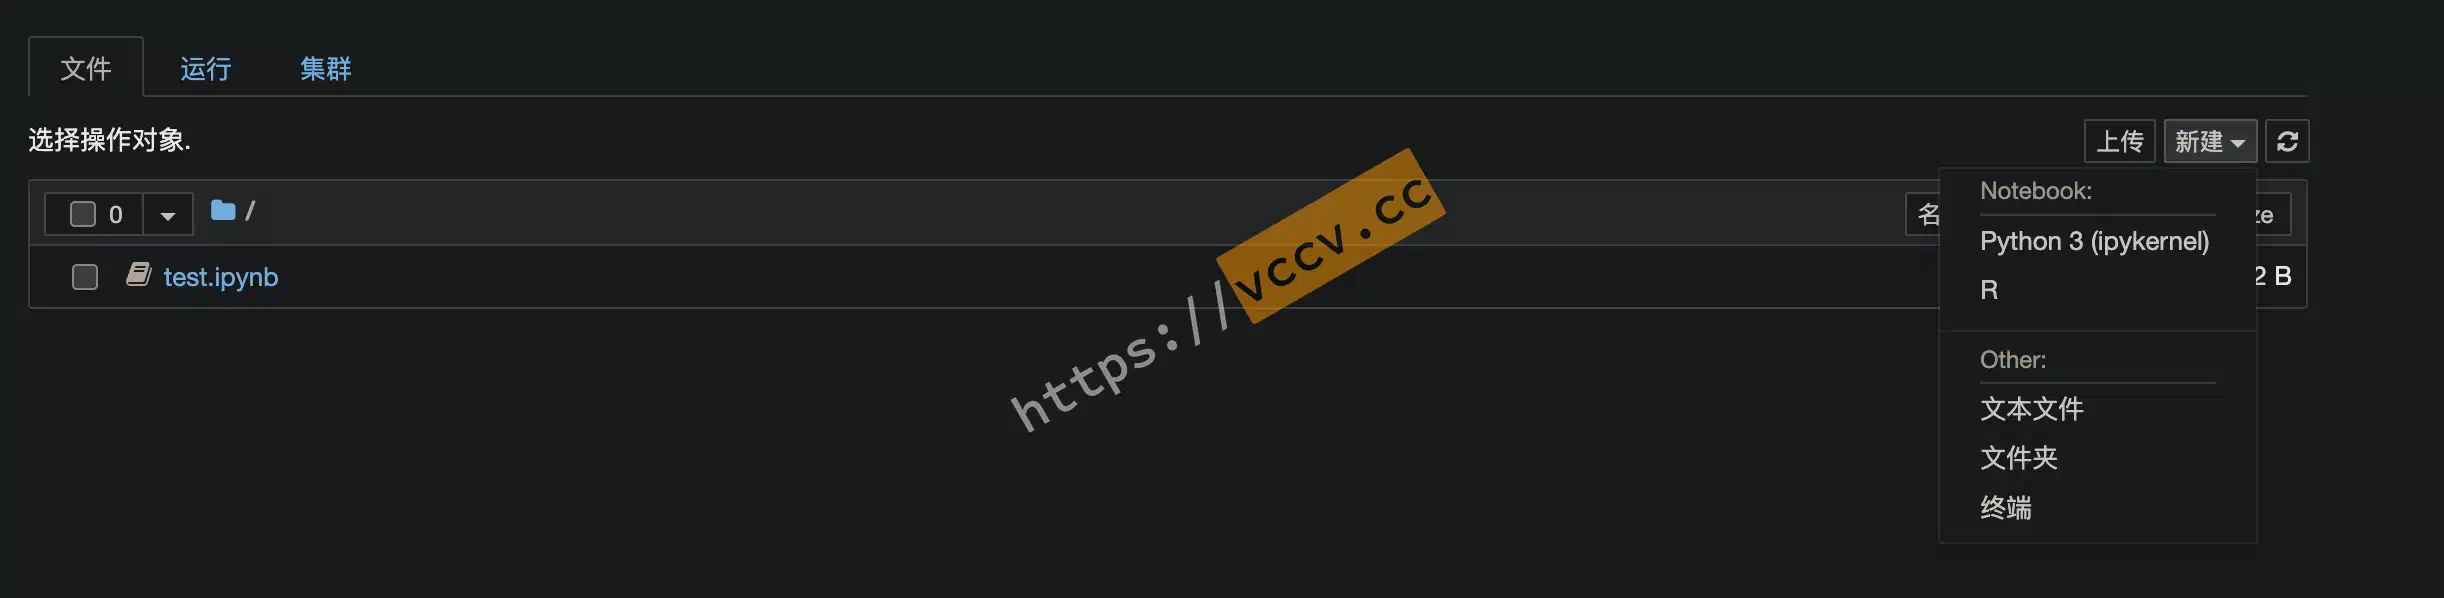
### Specify to install using the default source# r-irkernel is the r-kernel for jupyter notebook# jupyter includes jupyter notebookconda install -c defaults r-irkernel jupyter
Note:
Do not use conda-forge to install r-irkernel and jupyter here.
As mentioned before, Conda Forge and Anaconda are not fully compatible. I personally tried to install it using the conda install -c conda-forge r-irkernel jupyter command and jupyter notebook did not start properly. In this case just uninstall and reinstall.
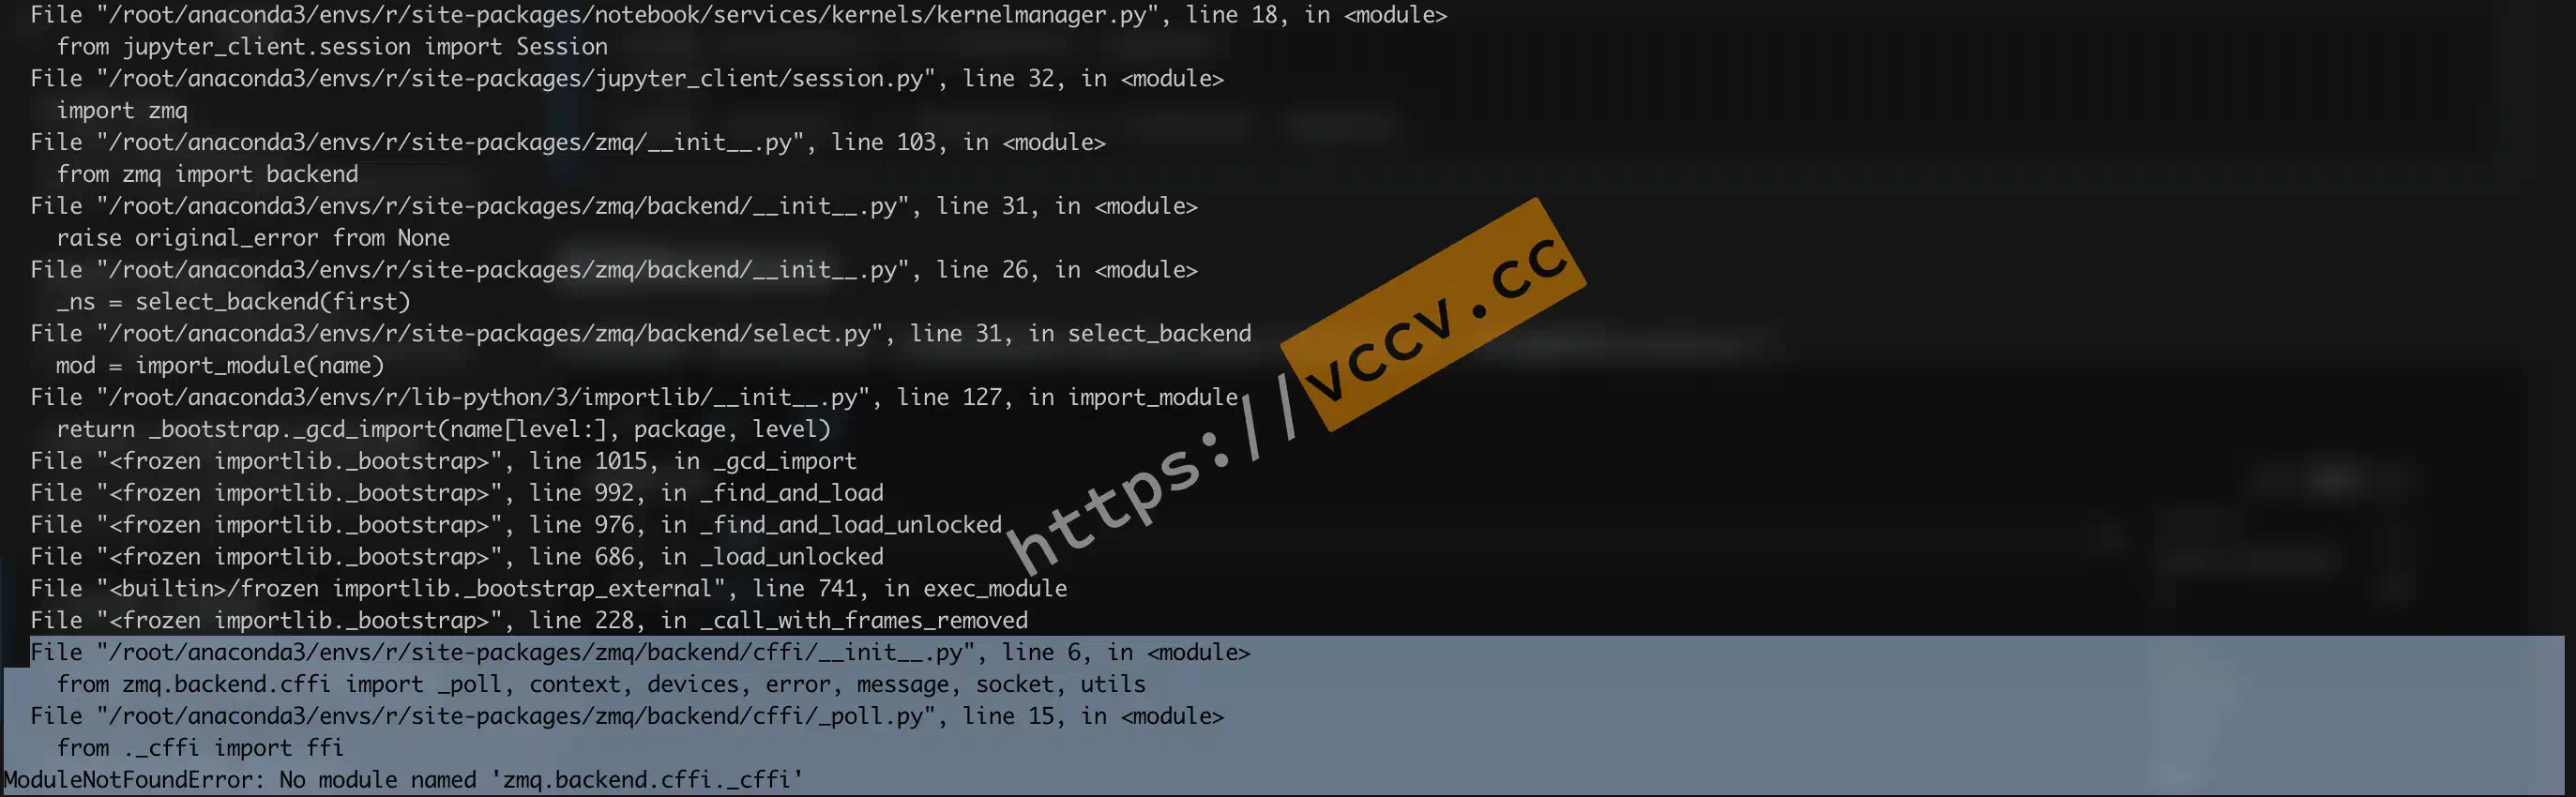
# Use pip instead of conda to manage pyzmq packagespip uninstall pyzmq
pip install pyzmq
Pro-tested to work.
If you have similar ModuleNotFoundError problems, you can try the above method and use pip instead of conda to manage those python packages, uninstall and reinstall them first.
The main thing is to find that exact package name, you can try to search keywords in pypi
.
ipython
# Access the python consolePython 3.7.13 (default, Mar 29 2022, 02:18:16)Type 'copyright', 'credits' or 'license'for more information
IPython 7.31.1 -- An enhanced Interactive Python. type'? for help.
In [1]: from notebook.auth import passwd
In [2]: passwd()
Enter password:
Verify password:
Out [2]: 'argon2:$argon2id$v=19$m=10240,t=10,p=xxxxxxxxx' # Copy the content between '' needed later
In [2]: exit
jupyter notebook --generate-config # This will prompt you where the generated file is
vim ~/.jupyter/jupyter_notebook_config.py # Edit the file prompted in the previous step here
# Add or modify the following
c.NotebookApp.allow_remote_access = True
c.NotebookApp.ip = '*'
c.NotebookApp.password = u'argon2:$argon2id$v=19$m=10240,t=10,p=8$Vc5lLVsXKZLGftp6xrHfEfOkQvIU5YiOhdw' # Paste the previously copied key
c.NotebookApp.open_browser = False
c.NotebookApp.port = 61111 # Set the port and be careful not to duplicate it with others
c.NotebookApp.notebook_dir = '/home/xxx/'# not necessary set jupyter default directory# Once set, you should be able to access it normallyjupyter notebook
This part is not essential and is for record only.
 1
 2
 3
 4
 5
 6
 7
 8
 9
10
11
12
13
14
15
16
17
# Configure themespip install jupyterthemes
# A set of theme settings that I personally like and have gotten used tojt -t monokai -f fira -fs 13 -cellw 90% -ofs 11 -dfs 11 -T -N
# Restore the default themejt -r
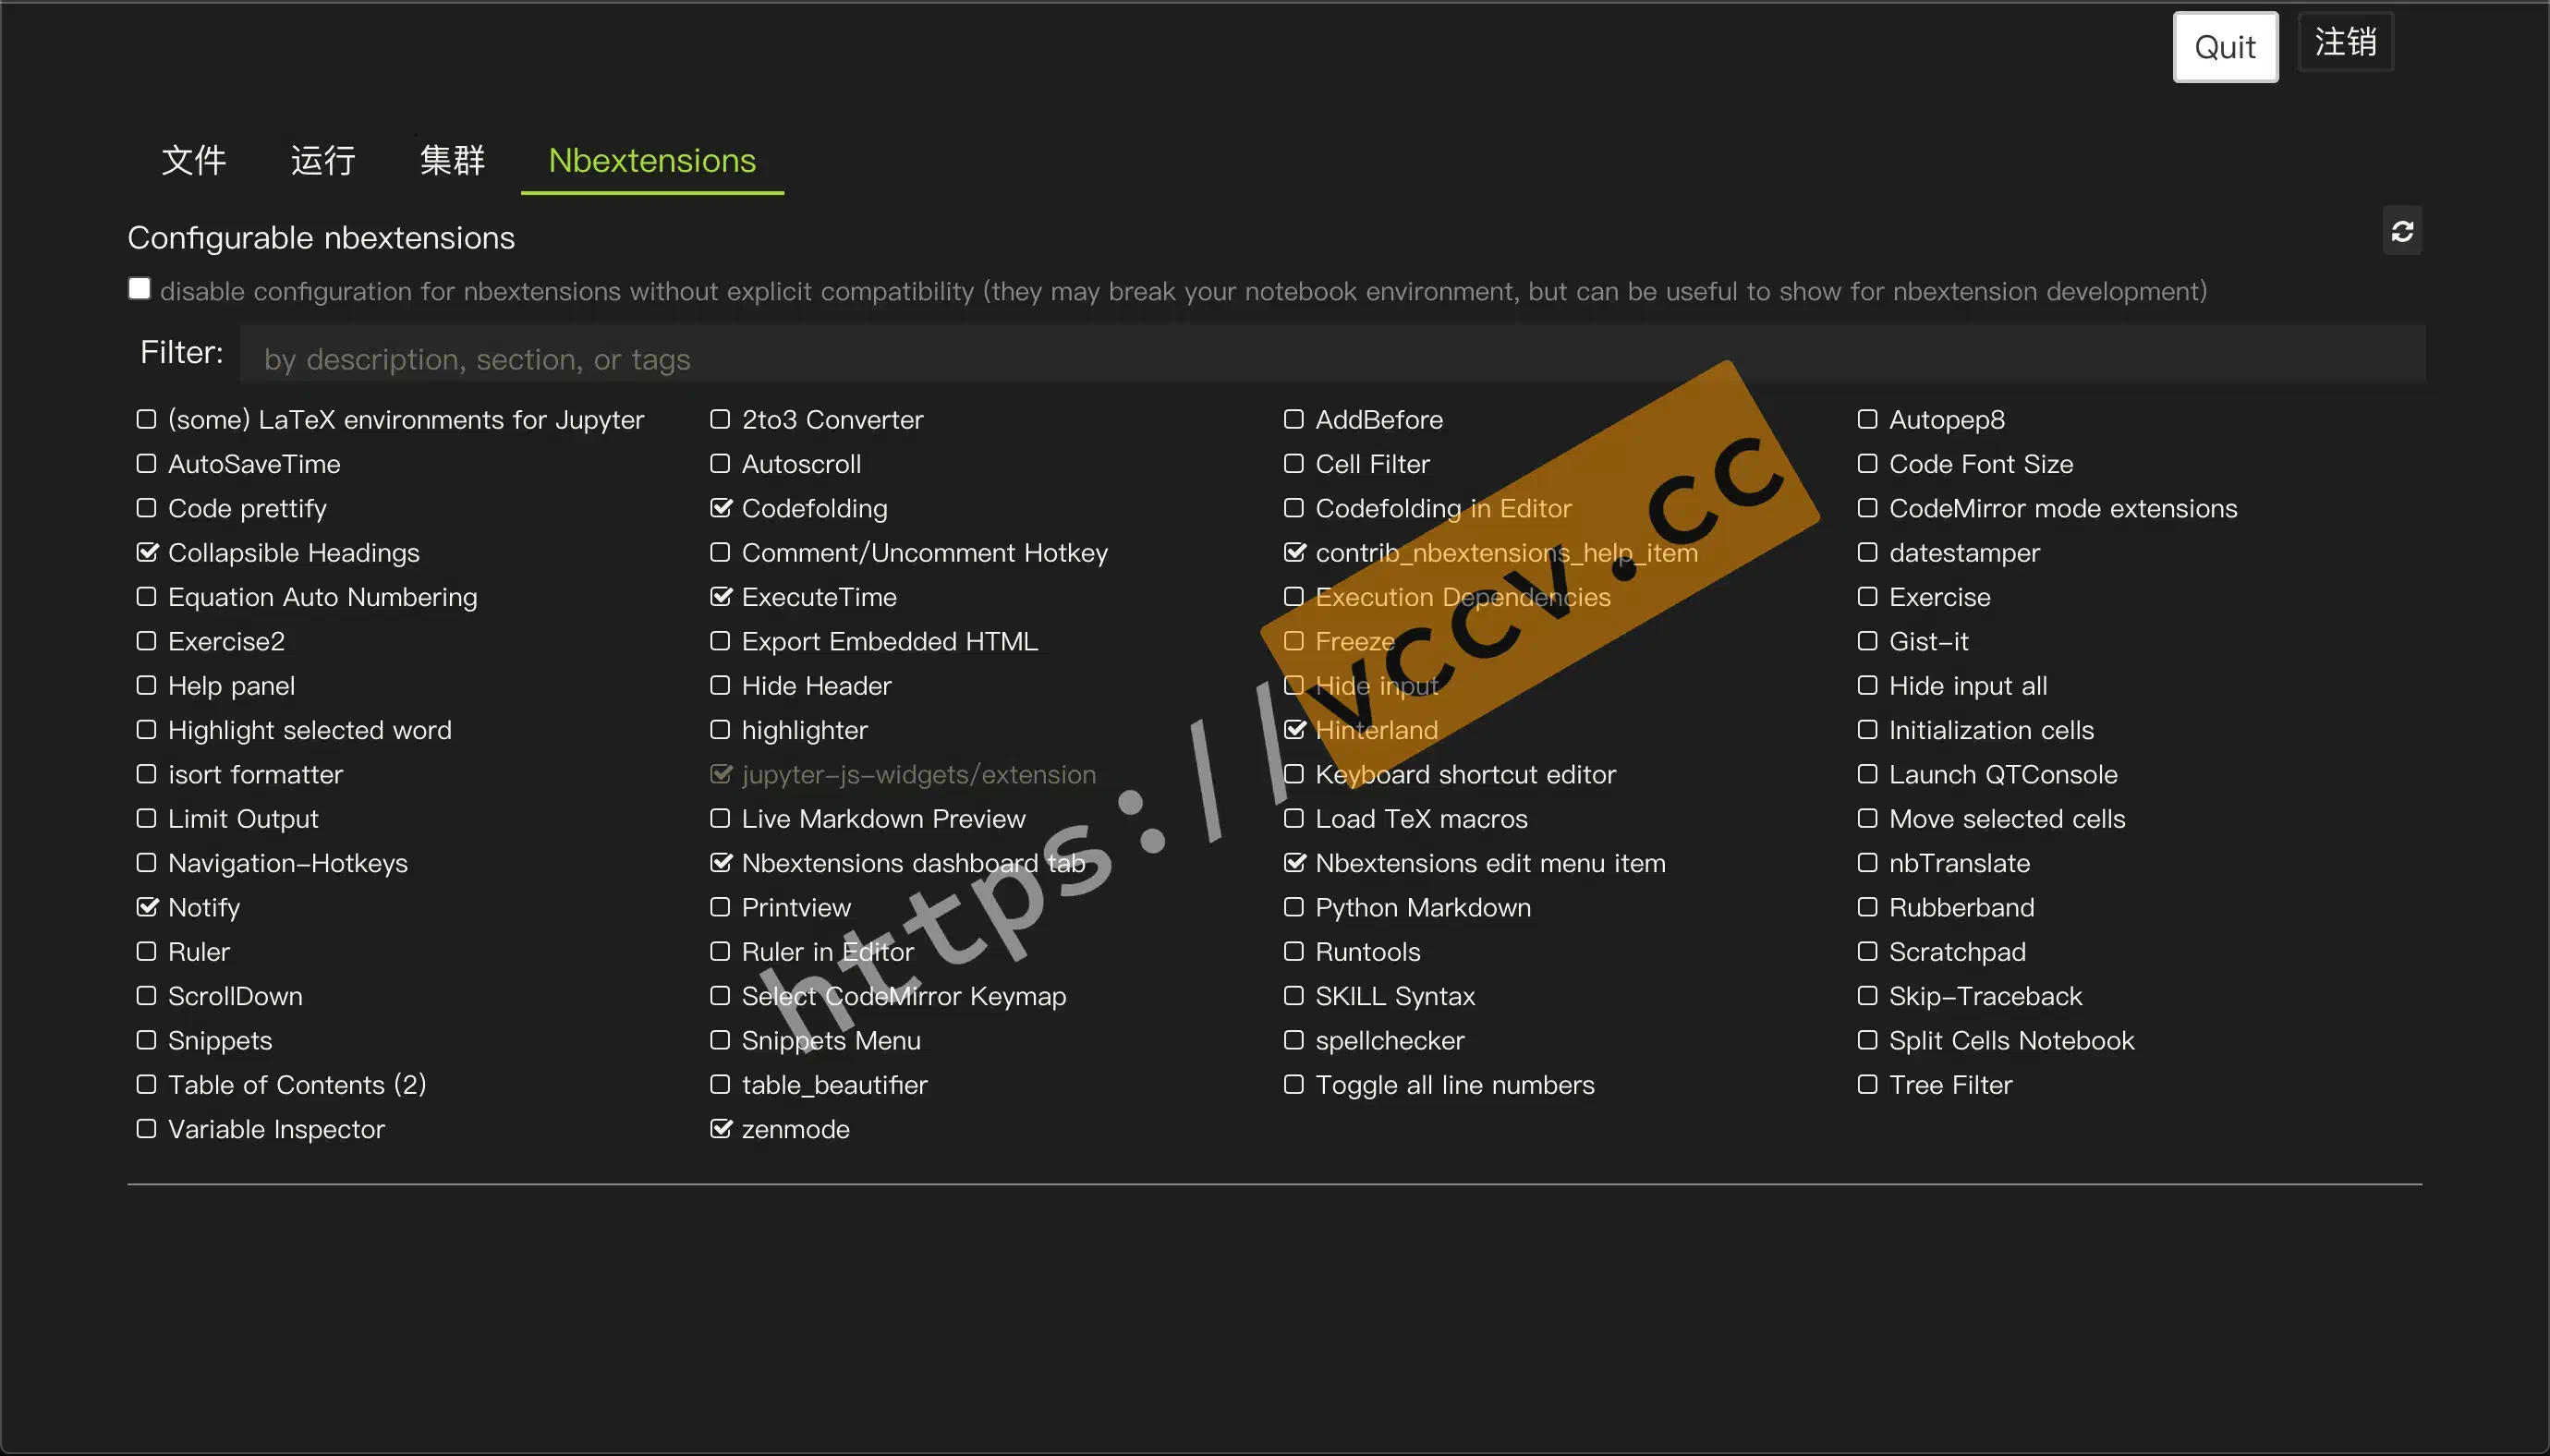
# Configure pluginspip install jupyter_contrib_nbextensions
jupyter contrib nbextension install --user
pip install jupyter_nbextensions_configurator
# Suggested configuration items# Hinterland code completion# Collapsible headings Collapse headings# Notify notification mechanism to run time-consuming tasks and notify when they are completed# Codefolding collapsing code# zenmode Hide the active status bar for easy attention to the code# ExecuteTime shows the running time