Start
I’m at home on vacation and I need to use EasyConnect to connect to the school’s intranet. I occasionally need to connect to the school’s server or access intranet pages, so I plan to download it.
But! EasyConnect is a rogue software, which is often referred to as a cancerous software. I then started looking for ways to deal with it.
Under macOS, EasyConnect primarily behaves as follows.
- background resident processes EasyMonitor and ECAgentProxy, both running with root privileges.
- automatically installs root certificates, including the system root certificate and FireFox root certificate, and reinstalls them after deletion.
ps: Resident processes with root privileges means that these processes can read and write anything; installing root certificates means that they can directly perform man-in-the-middle attacks and tamper with data at will.
Method 1
This method is suitable for computers with EasyConnect already installed, with minimal tossing.
use
sudo suto obtain administrator privileges.Delete (rm)
/Library/LaunchDaemons/com.sangfor.EasyMonitor.plist.
delete /Library/LaunchAgents/com.sangfor.ECAgentProxy.plist.
reboot the Mac.
Open the keychain and delete the certificate under System Keychain - System - Certificates (keyword sangfor).
Be sure to restart the Mac before deleting the certificate, as the EasyMonitor process in the background will automatically import the certificate after it has been deleted.
This eliminates the problem with EasyConnect. However, so far it causes EasyConnect not to connect, so we need to start EasyConnect in a secure way. Two scripts can be written to achieve start and exit.
startEasyConnect.sh
| |
killEasyMonitor.sh
| |
Place the above two scripts under the PATH path and grant executable permissions to.
| |
When you need to use EasyConnect, execute the startEasyConnect command as regular user (the EasyMonitor process will not have permission to import the root certificate). After exiting EasyConnect, run killEasyMonitor to kill the EasyMonitor process in the background.
Method 2
Suitable for those who have not yet installed EasyConnect and have some knowledge of Docker and are not afraid of trouble. (being used)
Installing Docker
Installing Clash
ClashX or ClashX Pro versions can also be installed on macOS
Install VNC Viewer (optional)
If you are using EasyConnect which requires a graphical interface to log in, you need to install VNC Viewer, otherwise you can skip this step.
If you don’t know, you can skip this step and return to it later when you are prompted to run EasyConnect with Docker and cannot finish in the command line interface.
The installation of VNC Viewer is very simple, go to the Download page on the official website, select the appropriate version to download, and then go all the way to the next step to complete.
Installing a text editor
Because it involves editing and modifying yaml files, you may need to install a VSCode , which does not use Notepad because it does not have highlighting, does not spell words, and does not automatically format, which may cause you to have some indentation, spelling, and punctuation errors that are more It is difficult to find.
VSCode is free, but here is another recommended software: Sublime Text (paid).
Running EasyConnect with Docker
First make sure that your Docker is running (try run docker ps -a). Open a terminal and enter different commands depending on whether you need a graphical interface or not.
2022.12.29 Updated
I am an Intel model of MacBook, according to the reminder of the old brother in the comments section, the following tutorial does not apply to Apple’s own M series chips, i.e. arm architecture machines.
Since I don’t have an M-chip machine, please try compiling non-amd64 branch files on your own if needed, see issue167 for details. If you encounter new problems during the compilation process, you can read more issues raised by others.
Pure command line version:
| |
The commands are explained below.
- In the first line, we create a configuration file in the
$HOMEdirectory of the current user to save login information. - On the second line, we start an EasyConnect command-line version of the Docker container.
--device /dev/net/tun --cap-add NET_ADMINcreates the virtual network device.-itreturns an interactive terminal to display information.-vspecifies the mount volume, where we map the configuration file in the$HOME$directory of the current user to the container, enabling the persistence of login information.-pspecifies the port mapping of the container, you can change the port number according to the actual situation. where 1080 is the Socks5 proxy port and 8888 is the HTTP proxy port.-e EC_VERSet the value of the environment variableEC_VERin the container, specifying the version of Sangfor, preferably the same as the server side.-e CLI_OPTSsets the value of the environment variableCLI_OPTSin the container, specifying the parameters when running Sangfor. Here-dspecifies the VPN address,-uspecifies the user name, and-pspecifies the user’s password. Please modify these information yourself correctly!-e IPTABLES_LEGACY=1uses the old iptables command, mainly to maintain compatibility with WSL. On some distributions of WSL, the absence of this environment variable will prevent the VPN from functioning properly. (Optional)
Please refer to: usage.md for specific parameter settings
GUI version:
| |
Where hagb/docker-easyconnect:7.6.3 means use 7.6.3 version of EasyConnect, please change the version number according to the actual situation.
PS: When your port 5901 or 1080 is occupied by other services, you can change the port of EasyConnect that we run with docker above by using the following command (for example, the command line version is pure, the GUI version is the same);
127.0.0.1:15901:5901 and 127.0.0.1:10180:1080. You can change the 15901 and 10180 in 127.0.0.1:15901:1080 to your own unoccupied ports.
1docker run --device /dev/net/tun --cap-add NET_ADMIN -ti -e PASSWORD=xxxx -v $HOME/.ecdata:/root -p 127.0.0.1:15901:5901 -p 127.0.0.1:10180:1080 hagb/docker-easyconnect:7.6.3
Graphical VNC Viewer connection
After typing, open VNC Viewer, click File -> New connection in the upper left corner, or right click -> New connection in the blank space, or use the shortcut key Ctrl + N to create a new link, and fill in the VNC Server in the pop-up dialog box 127.0.0.1:5901 , Name can be left out.
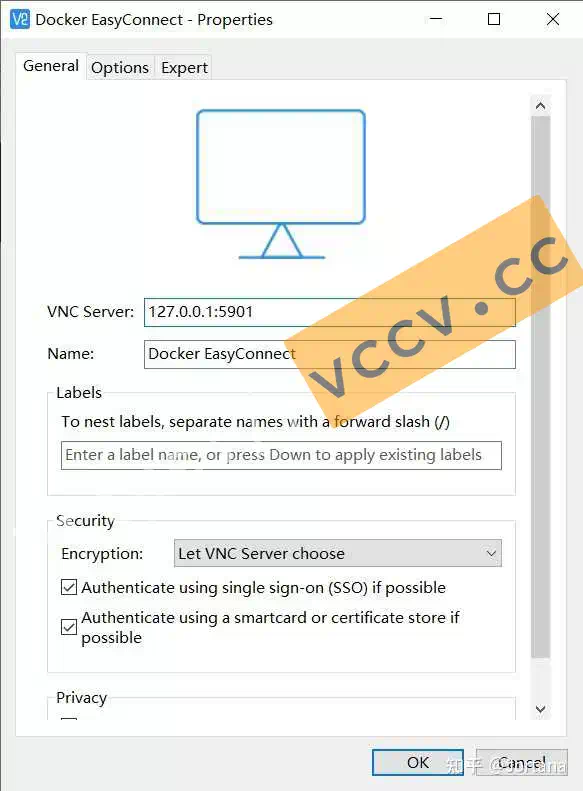
After clicking OK, double-click the link we just created, enter the password XXXX, and you’re ready to connect.
It’s much easier to run EasyConnect in Docker without having to enter a captcha.
It is more convenient.
Also, the project itself remembers the server address you entered, so you only need to click the login button when you use it in the future.
At this point, you’ll have a socks5 proxy running on 1080 port on your computer, and the next step is to configure Clash to forward when we need it.
Configuring Clash
This section describes how you can use EasyConnect’s VPN service when you need it.
First run Clash, click Profiles in the left navigation bar and you will see a default config.yaml, or you can edit other profiles if you have them. Click on the button shaped like < > to the right of the profile you want to edit, meaning edit the profile in a text editor, and add at the end.
| |
Caution.
The
222.192.6.0/24filled in here means that only the traffic accessing222.192.6.xxxwill go through the proxy configured above, which needs to be changed according to your actual situation.Of course, if you are editing your own airport configuration file, you need to add the above content under the original
proxiesandrules, and * cannot add these two attributes*.
At this point, in Clash’s General page, turn System Proxy on and you will have access to the school’s intranet, but not to remote desktops and other features, which will require further configuration if you need to use them.
Configure ClashX
Similar to the above.
| |
Configuring TUN mode
For TUN mode, the official documentation describes it as follows.
For software that does not follow the system proxy, TUN mode can take over its traffic and leave it to CFW. In Windows, TUN mode performs better than TAP mode.
Applications such as browsers use the system agent, and some non-system agent applications can be set up to be handled by CFW. In short, after configuring TUN mode, our requirements are ready to be implemented. To start TUN mode, you need to do the following (MacOS users skip the first two steps):
- open the General page of Clash, find Home Directory, click
Open Folderon the right to open theHome Directoryfolder. - Go to the website Wintun
and click
Download Wintun xxxin the interface to download the zip package. Copywintun.dllfrom the directory corresponding towintun-x.xx/wintun/binto theHome Directorydirectory according to the system version. Use theamd64version for64based processors for64bit operating systems, and choose thearm64version for M1 Macs. - Click Manage on the right side of Service Mode in General, and install Service Mode in the window that opens, the application will restart automatically when the installation is finished, and the Earth icon on the right side of Service Mode turns green.
- Click settings -> Profile Mixin -> YAML, click Edit on the right side of YAML, enter the following content, and click the button at the bottom right to save.
| |
- Return to the general page to turn on Mixin, and then click connections to find that all connections are in TUN mode, at which point we have completed all configurations.
For more detailed configuration, please refer to the TUN mode page of the official documentation.
Filtering applications
Related rules can be found in.
| |
Note: The ports should correspond to the ports you configured in the previous docker configuration.
Rebooting
When you close the terminal window or reboot your computer and want to start Docker again, we just need to start the appropriate container and click Login in VNC Viewer (if you don’t use the graphical interface, you only need to start the container).
To start the container, you don’t need to type the command above to create the container, because the command means create the container, download the image, start and enter the container, we have already created the container, we just need to start it later. So, we first need to know what containers we have, and then start the corresponding containers on it.
First, look at the containers we already have
| |
You should get similar output, and if this is your first time using Docker, you should only have one container

When you want to turn it on again after the computer has restarted, just type.
| |
The 81f is the ID of the container I want to start, which is the value of the first column, it’s a long value, usually you only need to enter the first few digits, or you can change it with the docker rename command.
| |
Uninstalling EasyConnect
As I said before, one of the rogue things about EasyConnect is that it is very difficult to uninstall, but I have come up with a method based on information from the Internet and my own experience.
First, find the EasyConnect installation directory and double-click it to run the uninstaller, then you will see that the directory is not completely deleted, there are still a lot of files, so let’s perform the following steps.
- select all Shift + Delete, if you encounter the one that does not give the deletion will be skipped, then there will still be many files left.
- Disconnect and restart the computer, come to the installation directory, change the names of all the folders, change them to whatever you want, restart again
- Select all the folders that have just been renamed Shift + Delete, if this time still can not delete the folder cut to another place and then delete
- restart the computer, administrator privileges to open the command line (if you do not have the usual command line tools can Win + X select Windows PowerShell (Administrator))
- enter the command
netsh winsock resetand enter
The last two steps to reset winsock are very important, if not performed will likely be a variety of clients can not connect to the network situation.
If you still have the sanfor service after uninstallation, you can refer to this article to try to solve it.