Preface

I used to use Hexo framework. But with the increasing number of articles, custom projects are more and more, coupled with the NPM plug-ins are in constant conflict, have not dared to arbitrarily install new plug-ins, the difficulty of maintenance has risen greatly. Former Hexo blog project file has been a “shit”.

As the saying goes, “break and then stand up”, taking advantage of this period of time is relatively free, I directly switch to the Hugo framework. My first and deepest impression of Hugo is that it is very fast, more than twice as fast as Hexo, of course, I also found some of the places that are not adapted to: the original blog webp image compression and watermarking features are automatically generated by the plug-in, this is the use of Hugo’s highly customizable and rich image processing api restore the blog’s image structure.

Hugo Image Customization

Hugo has a Render Hooks function, you can replace some of the components to generate styles, which contains images resources. Here is the official introduction, if you are interested, you can go to learn more about it.

When rendering Markdown to HTML, render hooks override the conversion. Each render hook is a template, with one template for each supported element type :: Rendering hooks are used to render HTML to Markdown.

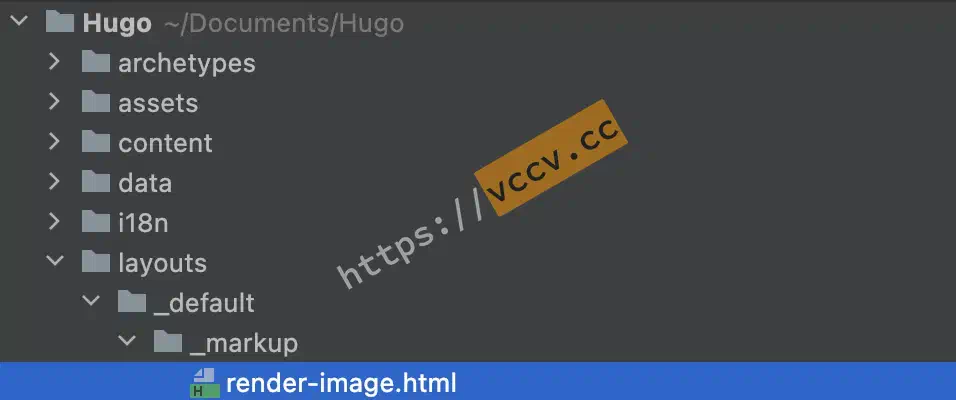
For images, we need to create or modify the content oflayouts/_default/_markup/render-image.htmlfile for customization. If this is the first time you know about this concept, please first create this file in the appropriate path in your blog root directory, note that it is not in the theme theme directory.

Creating image customization files

Next I will give a reference article and code for each treatment, I will give detailed comments at the end of the article all the code, each subsection of the code is for reference only, similar to pseudo-code, can not be used directly.

Webp Compression

Show Results

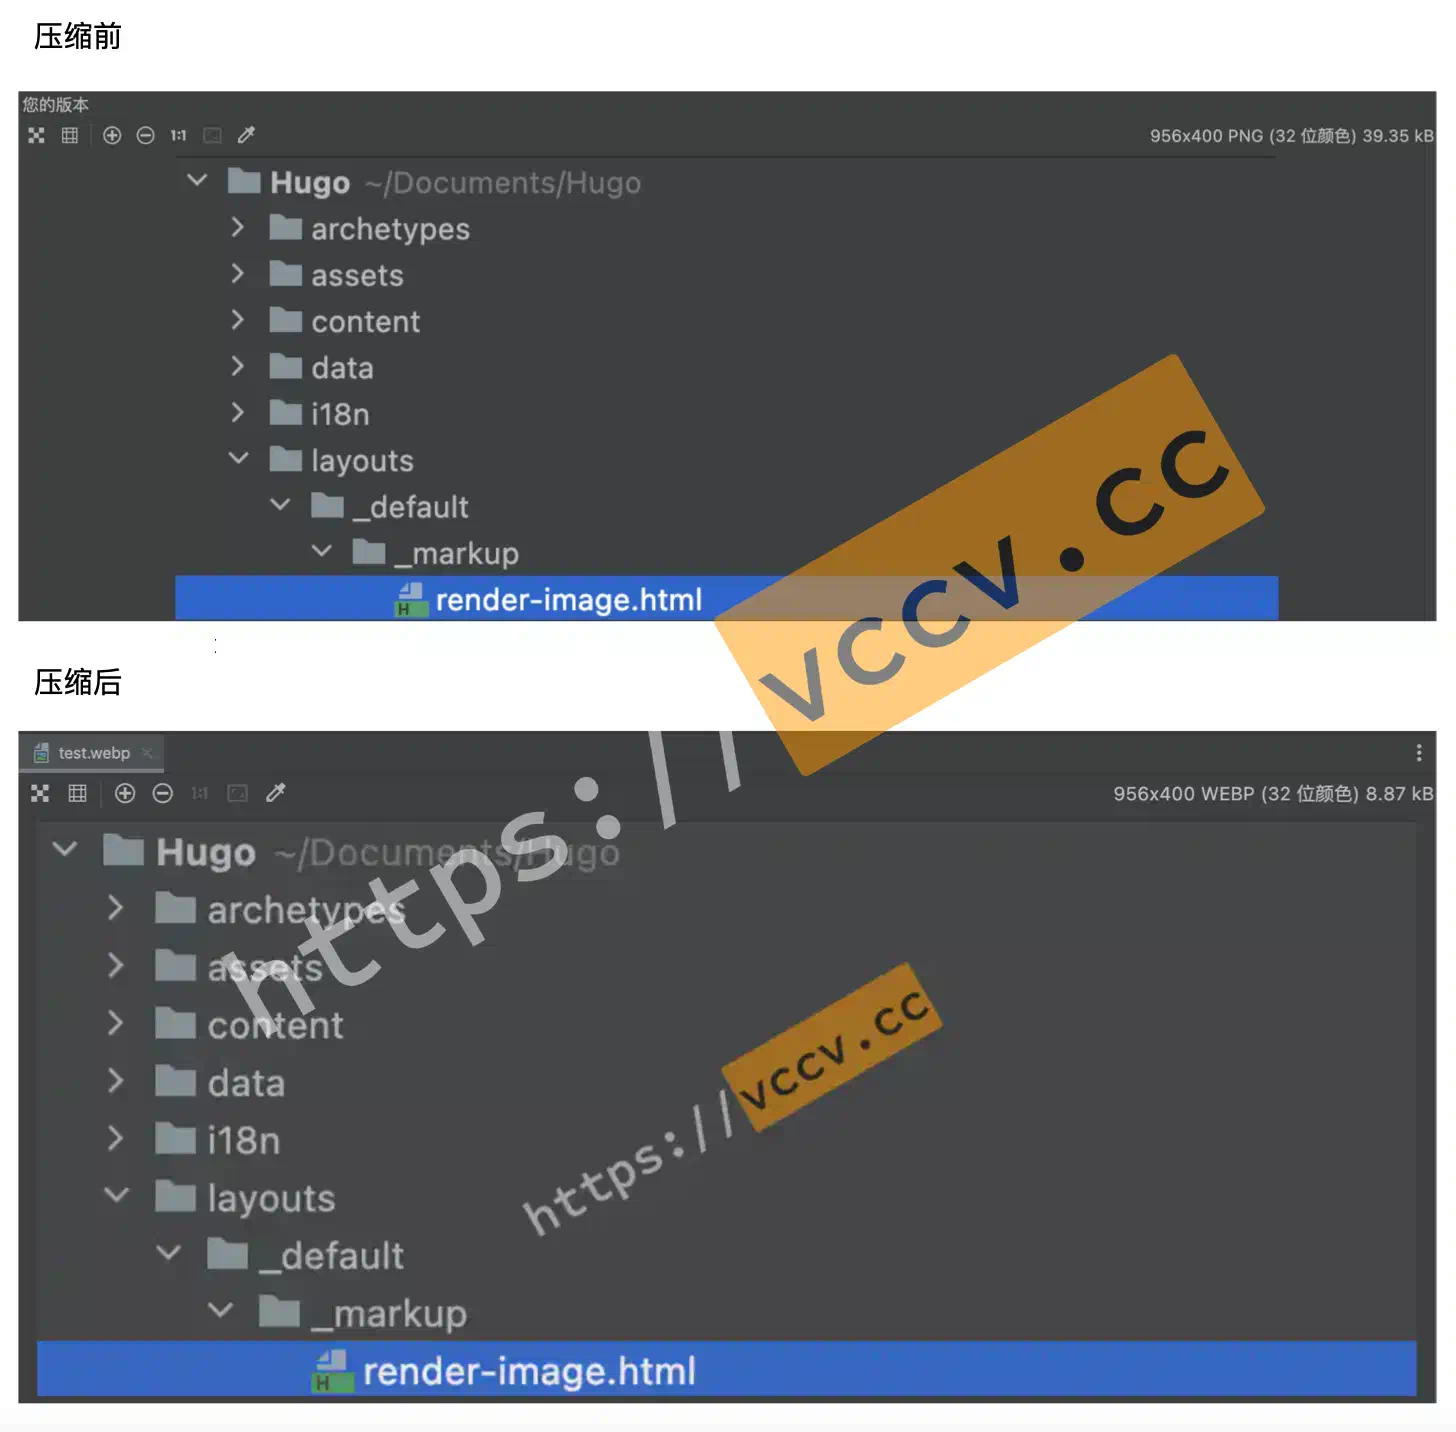
The memory usage of a static blog is dominated by images, which can be more than 100kb, making the already fast blog even worse (the blog is hosted on Cloudflare, which is free, and the speed in China is impressive). The common png, jpg and other image files can be compressed into webp format to significantly reduce the footprint.

The image above, for example, takes up 39.35 kb before compression and 8.87 kb after compression.

Compare

Principle Analysis

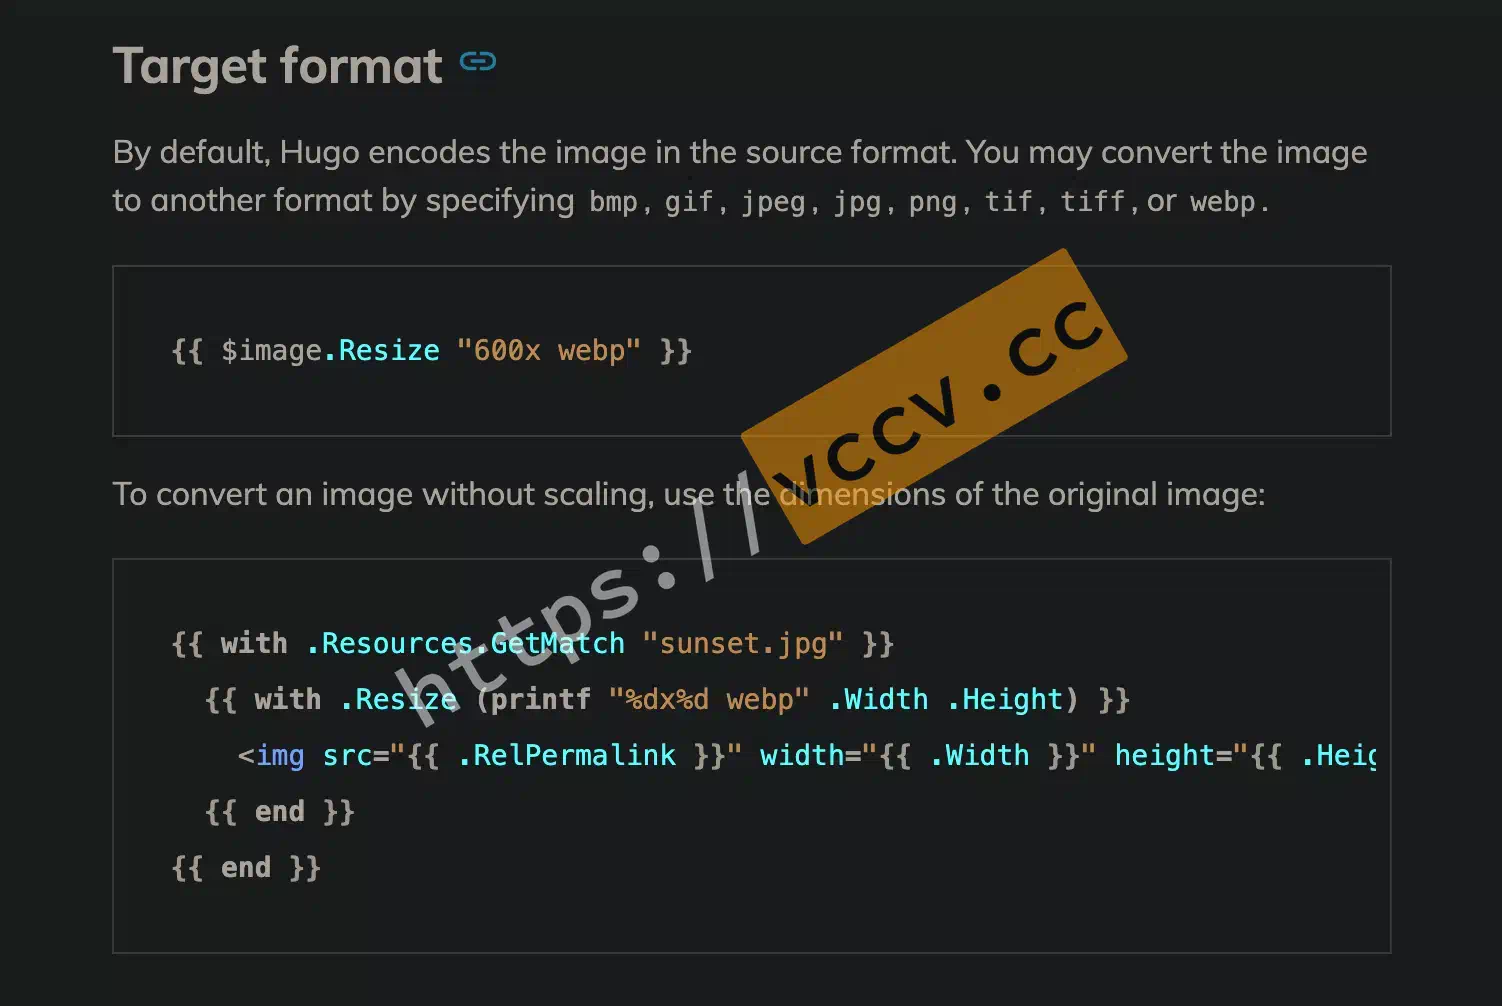
Refer to Hugo’s method of automatically converting images to webp, which mainly utilizes theimage.Resizemethod, official docs means that you can specify the specific aspect and format.

Target Format

Reference article added to recognize image EXIF orientation to prevent image orientation change after format conversion.

 1
 2
 3
 4
 5
 6
 7
 8
 9
10
11
{{ with $rawImage.Exif }}
  {{ if eq .Tags.Orientation 1 }}
      {{ $image = $image.Resize (print $image.Width "x" $image.Height " webp") }}
  {{ else if eq .Tags.Orientation 3 }}
      {{ $image = $image.Resize (print $image.Width "x" $image.Height " webp r180") }}
  {{ else if eq .Tags.Orientation 6 }}
      {{ $image = $image.Resize (print $image.Height "x" $image.Width " webp r270") }}
  {{ else if eq .Tags.Orientation 8 }}
      {{ $image = $image.Resize (print $image.Height "x" $image.Width " webp r90") }}
  {{ end }}
{{ end }}

Add Watermarks

Method Source

I basically didn’t find what I needed on the Chinese Internet, and finally found a three-year-old article in the blog of the author of the PaperMod theme (which is the theme used in this blog): Watermarking images with HUGO.

The main idea is to use the image.Filter and image.Overlay methods to overlay a watermarked image onto each image.

1
2
{{- $logo := $logo.Resize (printf "%.0fx jpg" $size) }}
{{- $image := $image.Filter (images.Overlay $logo (sub $image.Width $logo.Width) (sub $image.Height $logo.Height) ) }}

This requires a simple structure for the watermark image, and it is recommended to use a website logo or blog URL to create the watermark overlay. My watermark is made through this tool.

Code Show

The original author will cover the watermark to the lower right corner of the picture, I modified the centered transparent tilt placed, not too much impact on the reading experience, but also to better protect their image copyright.

1
2
3
4
5
{{ $size := math.Round (mul $image.Height 0.80) }}
{{ $size := cond (ge $size 250) $size 250.0 }}
{{ $logo := $logo.Filter (images.Opacity 0.5)  }}
{{ $logo := $logo.Resize (printf "%.0fx png r30" $size) }}
{{ $image = $image.Filter (images.Overlay $logo (div (sub $image.Width $logo.Width) 2) (div (sub $image.Height $logo.Height) 2)) }}

You need to calculate the length and width of the original image to determine the logo position, then use theimage.Opacitymethod to set the transparency, and finally center it.

Using Fancybox

My blog images usually contain a lot of textual information, and it would be very difficult to view the original image without zooming in. It so happens that fancybox is a js library that solves this kind of problem. The official website description is as follows:

Fancybox is the ultimate JavaScript lightbox alternative that sets the standard for premium user experience in multimedia display. Supports images, videos, maps, inline content, iframes and any other HTML content.

Reference Tutorial

The functionality is very powerful and will be shown here only for the image gallerygallery function. This step happens to be referenced in a previous tutorial I wrote for the Hexo Cactus theme:

Cactus Use Fancybox Image Enlargement
2022-02-20   #cactus #beautify #fancybox
Install fancybox to hexo theme cactus some experience for your reference. fancybox can solve the problem of cactus theme images can not be enlarged, thanks to fancyapps to make a contribution.

Code Show

Pay special attention to the first need to import the relevant css file and js file, and then modify the img upper layer of the a tag.

 1
 2
 3
 4
 5
 6
 7
 8
 9
10
11
12
13
14
<a data-fancybox="gallery" data-src="{{ $image.RelPermalink }}" data-caption="{{ .Text }}">
    <picture>
        <source type="image/webp" srcset="{{ $image.RelPermalink }}">
        <img
            width="{{ $rawImage.Width }}px"
            height="{{ $rawImage.Height }}px"
            style="width: 100%; height: 100%; max-height: 36rem;"
            loading="lazy"
            src="{{ $rawImage.RelPermalink }}"
            alt="{{ .Text }}"
            {{ with .Title }} title="{{ . }}" {{ end }}
        />
    </picture>
</a>

Add the picture tag is to adapt old devices that can’t parse webp files to display the original image and improve code compatibility. The width and height parameters are added to minimize the impact of CLS.

Summary

There is no guarantee that the code can be used 100% directly, a better way is to learn the principle step by step and modify it with your own theme features.

Code Summary

I’ll try to comment the following code in detail, just remove the comments when you use it. If there are other questions, you can leave a message in the comments section.

 1
 2
 3
 4
 5
 6
 7
 8
 9
10
11
12
13
14
15
16
17
18
19
20
21
22
23
24
25
26
27
28
29
30
31
32
33
34
35
36
37
38
39
40
41
42
43
44
45
46
47
48
49
50
51
52
53
54
55
56
57
58
59
60
61
62
63
{{/* Get the resource image of the current page matching */}}
{{ $image := .Page.Resources.GetMatch .Destination }}
{{/* Get logo images from resources, transparent background images work best */}}
{{/* The image needs to be placed in the assets/images directory in the root directory */}}
{{ $logo := (resources.Get "images/logo.png") }}
{{/* Check if the media type of the image is not gif or svg */}}
{{ if not (in (slice "gif" "svg") $image.MediaType.SubType) }}
    {{/* Preserve references to the original image */}}
    {{ $rawImage := $image }}
    {{/* Calculate 80% of the image height and make sure the minimum value is 250 */}}
    {{ $size := math.Round (mul $image.Height 0.80) }}
    {{ $size := cond (ge $size 250) $size 250.0 }}
    {{/* Adjust the transparency of the logo to 50% */}}
    {{ $logo := $logo.Filter (images.Opacity 0.5)  }}
    {{/* Resize the logo to the calculated $size in height, keeping the aspect ratio and rounding the corners with a radius of 30 */}}
    {{ $logo := $logo.Resize (printf "%.0fx png r30" $size) }}
    {{/* If the original image has EXIF information */}}
    {{ with $rawImage.Exif }}
        {{/* Resize and rotate the image according to its orientation */}}
        {{ if eq .Tags.Orientation 1 }}
            {{ $image = $image.Resize (print $image.Width "x" $image.Height " webp") }}
        {{ else if eq .Tags.Orientation 3 }}
            {{ $image = $image.Resize (print $image.Width "x" $image.Height " webp r180") }}
        {{ else if eq .Tags.Orientation 6 }}
            {{ $image = $image.Resize (print $image.Height "x" $image.Width " webp r270") }}
        {{ else if eq .Tags.Orientation 8 }}
            {{ $image = $image.Resize (print $image.Height "x" $image.Width " webp r90") }}
        {{ end }}
    {{ else }}
        {{/* If there is no EXIF information, then only resize, no rotation */}}
        {{ $image = $image.Resize (print $image.Width "x" $image.Height " webp") }}
    {{ end }}
    {{/* Add a logo watermark to the image, positioned in the center of the image */}}
    {{ $image = $image.Filter (images.Overlay $logo (div (sub $image.Width $logo.Width) 2) (div (sub $image.Height $logo.Height) 2)) }}
    {{/* Create a link to a data attribute that meets fancybox's requirements, showing the processed image */}}
    <a data-fancybox="gallery" data-src="{{ $image.RelPermalink }}" data-caption="{{ .Text }}">
        <picture>
            <source type="image/webp" srcset="{{ $image.RelPermalink }}">
            <img
                width="{{ $rawImage.Width }}px"
                height="{{ $rawImage.Height }}px"
                style="width: 100%; height: 100%; max-height: 36rem;"
                loading="lazy"
                src="{{ $rawImage.RelPermalink }}"
                alt="{{ .Text }}"
                {{ with .Title }} title="{{ . }}" {{ end }}
            />
        </picture>
    </a>
{{ else }}
    {{/* No webp compression for gif or svg images */}}
    <a data-fancybox="gallery" data-src="{{ $image.RelPermalink }}" data-caption="{{ .Text }}">
        <img
            width="{{ $image.Width }}px"
            height="{{ $image.Height }}px"
            style="width: 100%; height: 100%; max-height: 36rem;"
            loading="lazy"
            src="{{ $image.RelPermalink }}"
            alt="{{ .Text }}"
            {{ with .Title }} title="{{ . }}" {{ end }}
        />
    </a>
{{ end }}

Thanks

Hugo: Image render hooks

Hugo图片自动转webp的方法