I have heard about some smart unlocking plugins like IntelligentPass 4 and PassBy, and I found the "pain point" of these plugins: the Bluetooth unlocking feature is disabled. By modifying the source code of PassBy, we can solve this problem sideways.
I had heard about a plug-in for Smart Unlock called IntelligentPass 4. I found its official source and purchased it for $2.99 and discovered the “pain point” of such plug-ins, which is also the pain point of such plug-ins that can unlock by identifying secure Bluetooth devices.
Since iOS7 you can not get the MAC address of the Bluetooth device directly from the API, you can only use the UUID to identify the device, it should be noted that the same device does not show the same UUID on different phones, so it can not be used for unique identification.
But what I needed most was to use the Bluetooth auto-unlock feature in it, and after my constant attempts, that type of plugin was unable to discover my Amazfit watch device.
By the way, after finding out that the plugin didn’t work for me, I immediately contacted the author of the plugin source by email to get help or a refund. But!!! No one gave a shit about me. I then went to Reddit and found out that this plugin store is not reputable and has no after sales service. Remember to avoid the pit, my $2.99 ah 😭.
At this point, I found the open source project PassBy again and my eyes turned to it.
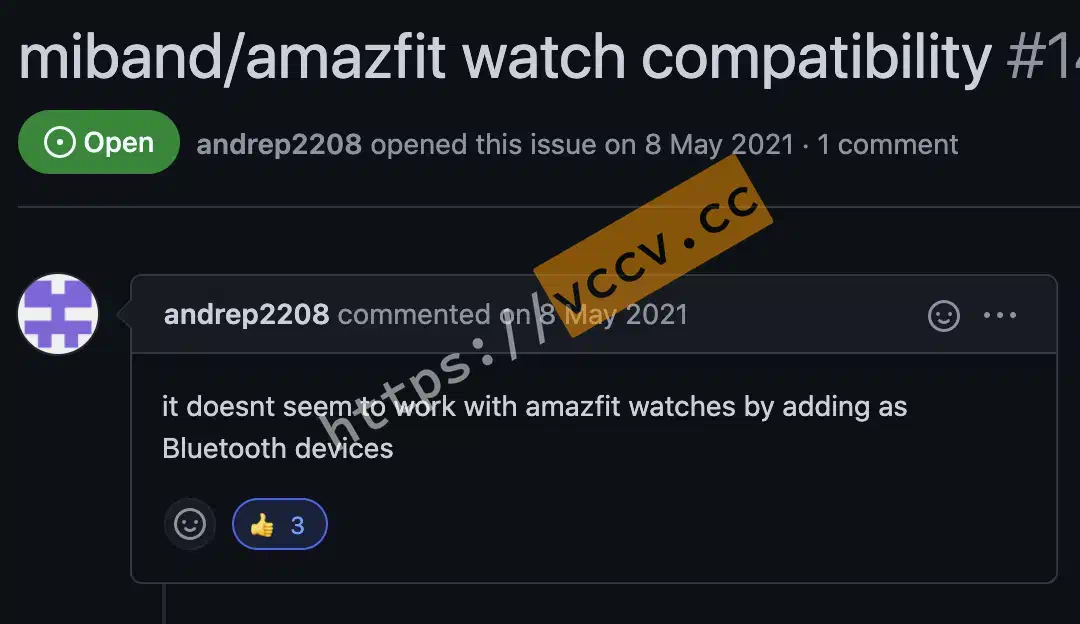
On the issue of the project I found that there were also people who had such problems:
Fortunately, PassBy is an open source plugin, and I saw some insights mentioned in the comments under that issue earlier:
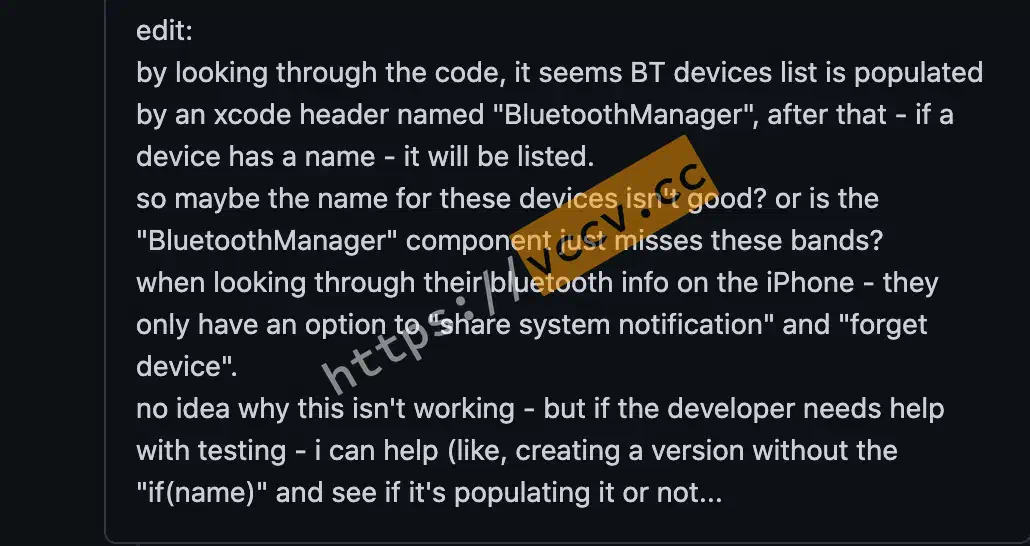
He says the BluetoothManager header used to get the Bluetooth device, can we get it by creating a version without if(name).
Since then, I think I can modify the source code myself and add the name of the device I need inside the judgment. It can’t get my device, so I’ll add it myself and think it should still work 😂.
After cloning the source code locally, I found that it was built via theos, so as a first step I had to set up the environment so that I could compile the plugin proper. theos’ Official Documents
is very detailed, and I’m on a Mac, so I followed its introduction about Mac systems to install.
After I built it, I tried to compile it first, but I found that PassBy needs iOS SDK version 13.3, but I didn’t find it in the official SDK provided by theos. Luckily, I found SniperGER provides the iOS 13.3 SDK
in Google.
Copy the SDK folder(s) in sdks to $THEOS/sdks and the folder(s) in include to $THEOS/include.
Opened the Tweak.xm file (I used Sublime Text) and found the main function isUsingBT that controls this piece of Bluetooth functionality by searching for the keyword bluetooth, the original code is as follows:
Because I was not familiar with the objective-c language, and did not go to the system to learn it, so I only relied on a little bit of learned C language to look at the bottom, and found that indeed, as mentioned above, the BluetoothManager header file used, where the most important logic is as follows:
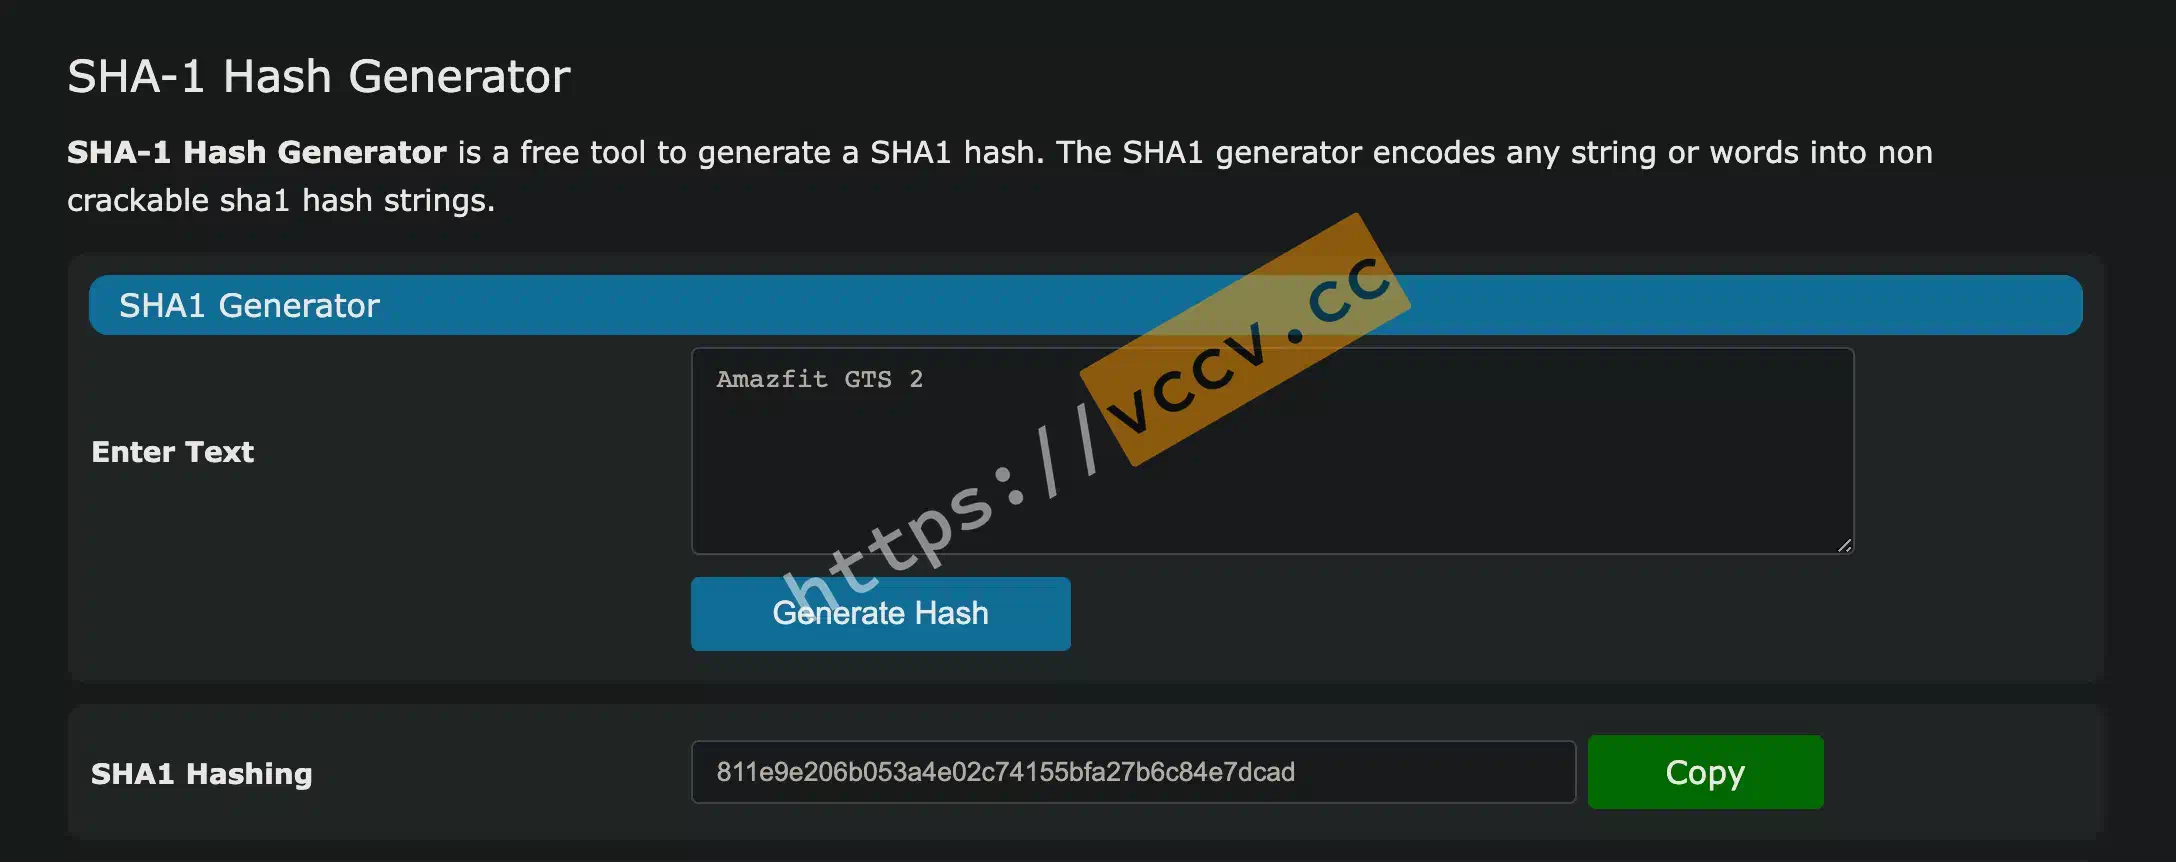
It stores the name of your allowed secure Bluetooth device deviceName into allowedBTs and I also found that it stores the data sha1 value of devicename into the passbybt.plist file eventually:
Above you see that it is storing the data sha1 value of the device name in the file passbybt.plist. We found this file in the iPhone using Filza and found that it is indeed so, it is in a dictionary format.
sha1
bool
063dc8e6c26233fc20a129a31403a642ea1095c4
true
811e9e206b053a4e02c74155bfa27b6c84e7dcad
true
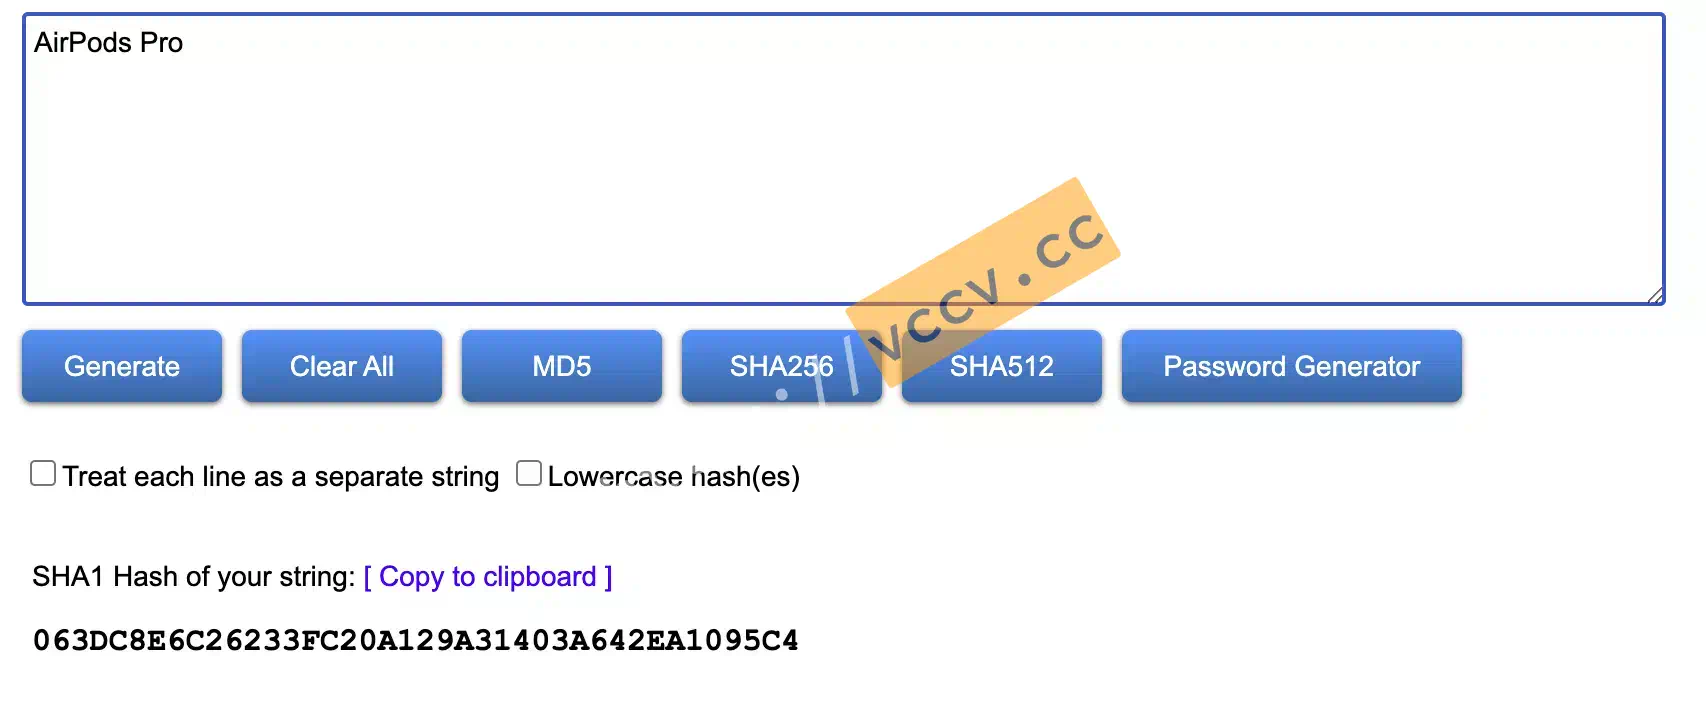
We can use the following web tool to generate the corresponding sha1 value for the device name and then add a new key-value pair: SHA-1 Hash Generator
.
2022.12.15 Updates.
Thanks to Vivian Chen for sending me an email alerting me that the site for generating sha1-hash is not working and for providing a new site, thanks again!
Special Updates.
The Lowercase hash option on the web page must be checked to convert all hash values to lowercase, always remember!!!
Create a new terminal in the PassBy project folder and enter the command make package to package the deb file and open it with Filza to install it.
Note: If the installation with Zebra does not work, modify the version number, open the control file in the root directory of PassBy, modify Version and then package and install it.
After testing, I was able to unlock and use my Amazfit GTS 2 properly. Since I’m not familiar with Obejective-c language, I’m satisfied that I was able to solve the problem successfully, although the steps are still troublesome.
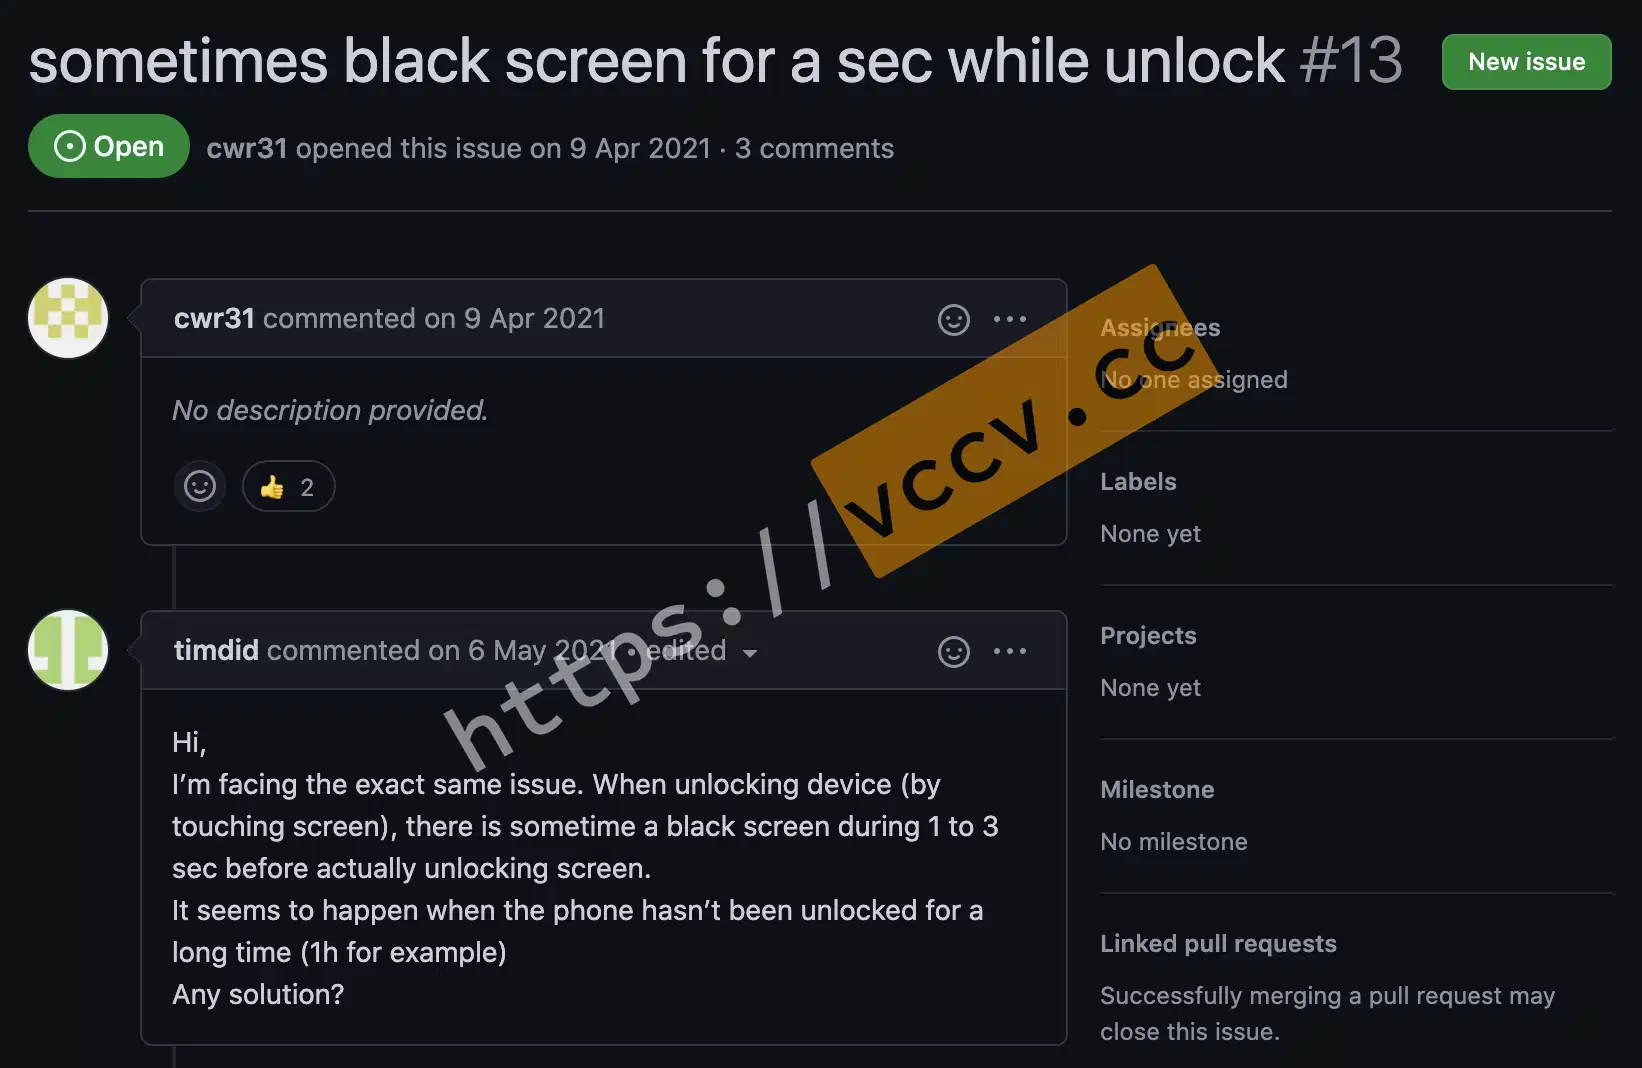
I found after using the plugin for a while that my phone would have an extra two or three seconds of black screen when lit. Sure enough, on GitHub this just found that someone also mentioned this problem, limited to my technical inability to know what this problem is and how to solve it, so I gave up on this plug-in.
In view of my technical inability, according to the article so modified, security aspects seem to be some problems, and I do not know how to improve.
If you don’t mind and don’t know how to compile, you can leave a message in the comments section at Equipment name and I will compile it for you.
After installation, the device does not appear inside the device list of the plugin settings, i.e. it does not change. Just remember In the passbybt.plist file, change the value to true for on and false for off .